Showing posts with label desserts. Show all posts
Monday, January 30, 2017
Salted Egg Yolk Mochi Ice Cream
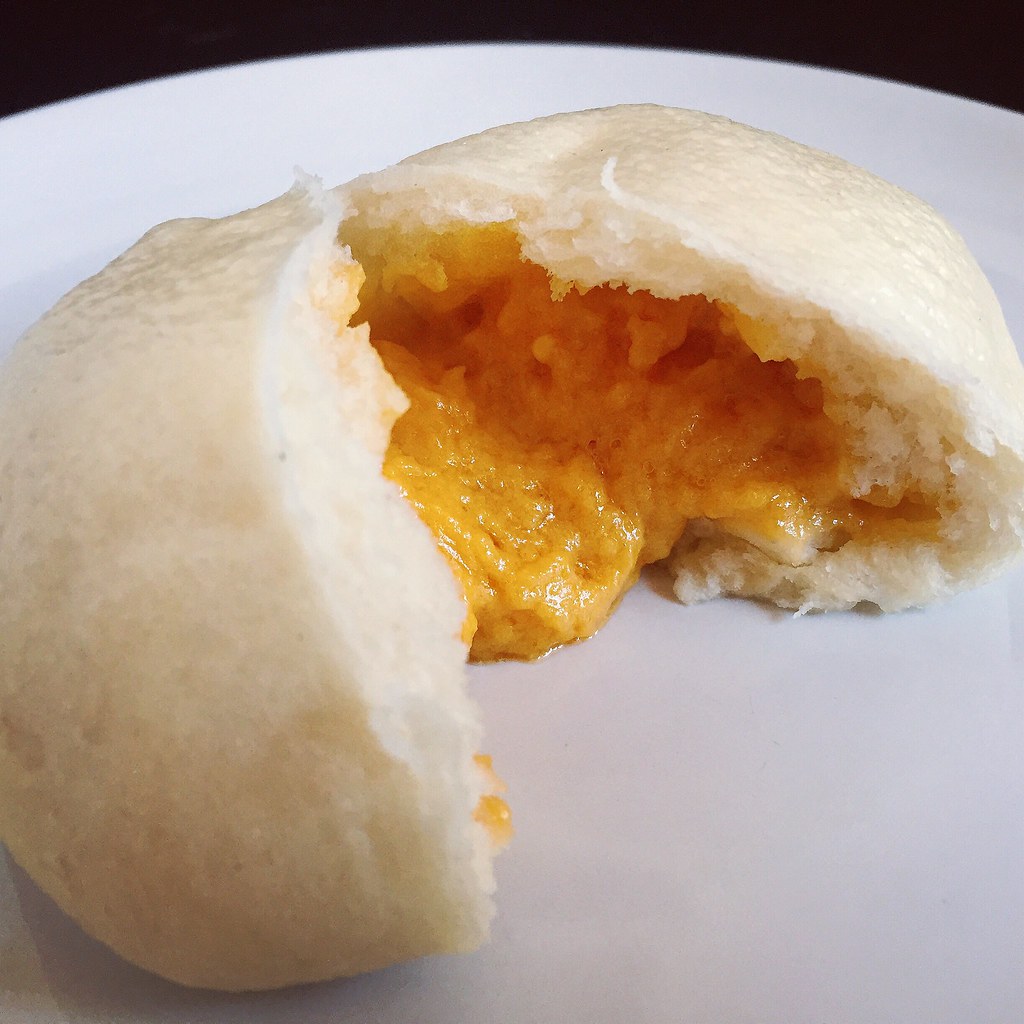
Earlier last year I discovered a new kind of steamed bun, the liu sha bao. I think translated directly it means "quicksand bun" but it's actually a lot better tasting that it sounds. Inside is a molten filling made of salted egg yolk custard, and I could probably eat 5 of them in a row. I tried making some a few weeks ago, but the result was just okay and not really worth all the work when I can just get the perfected bun at dim sum.
Because of that experiment I still had 3 cooked salted duck eggs sitting in my fridge, though, so I figured I'd try to make an ice cream out of them. I followed the template of Jeni's Salty Vanilla Frozen Custard, but I replaced 3 of the raw egg yolks with 3 cooked salted duck egg yolks, which you can find in the egg section of a Chinese grocery store. I reduced the salt a little because the egg yolks were already salted and added a little bit of turmeric to increase the yellow coloring of the ice cream. It still comes out a rather pale yellow, but I didn't want to add any artificial food coloring.
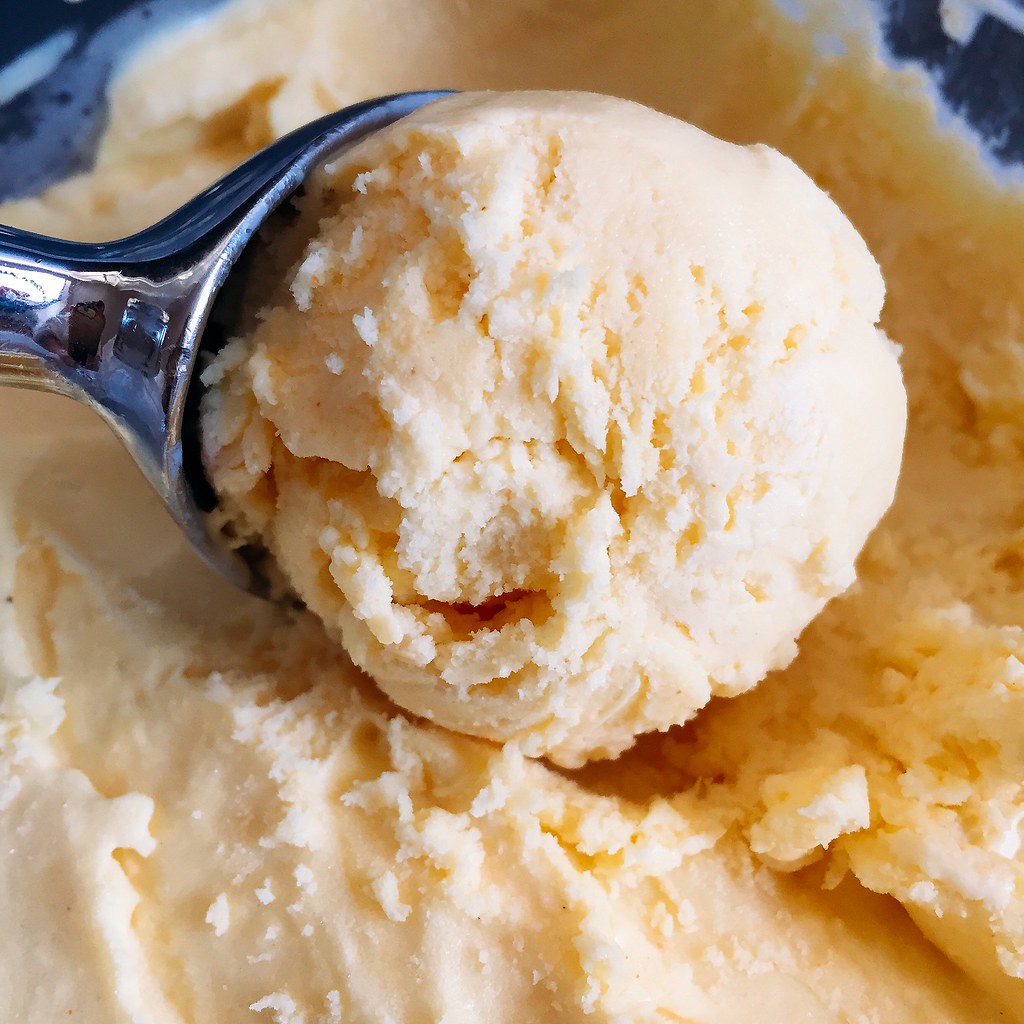
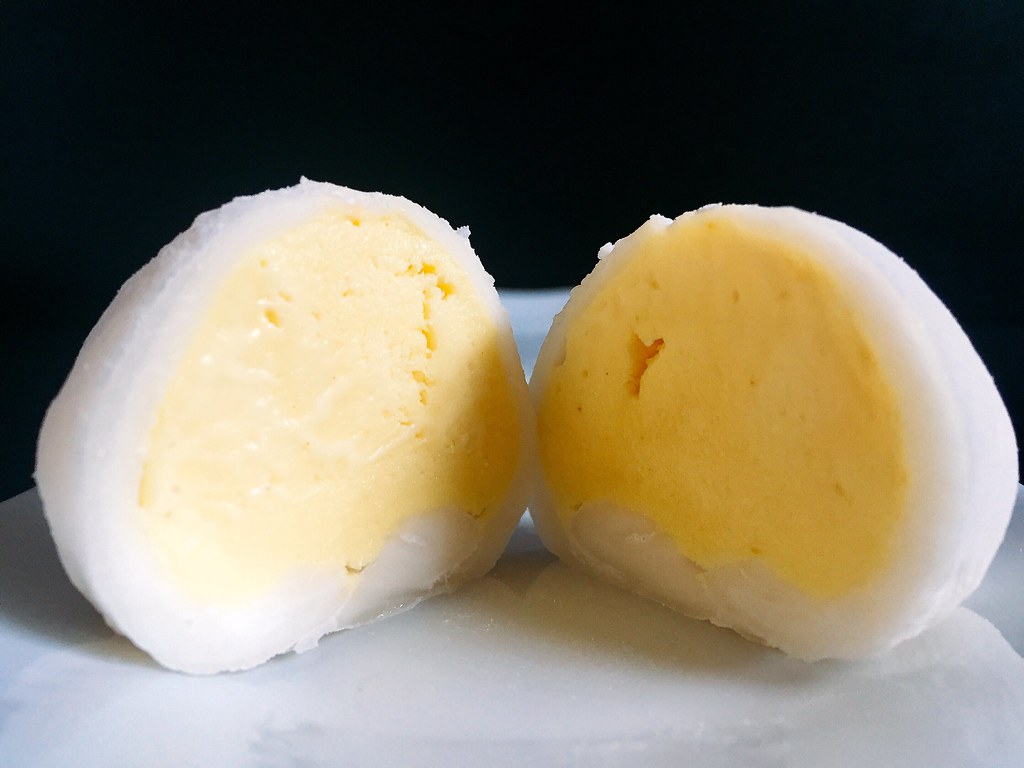
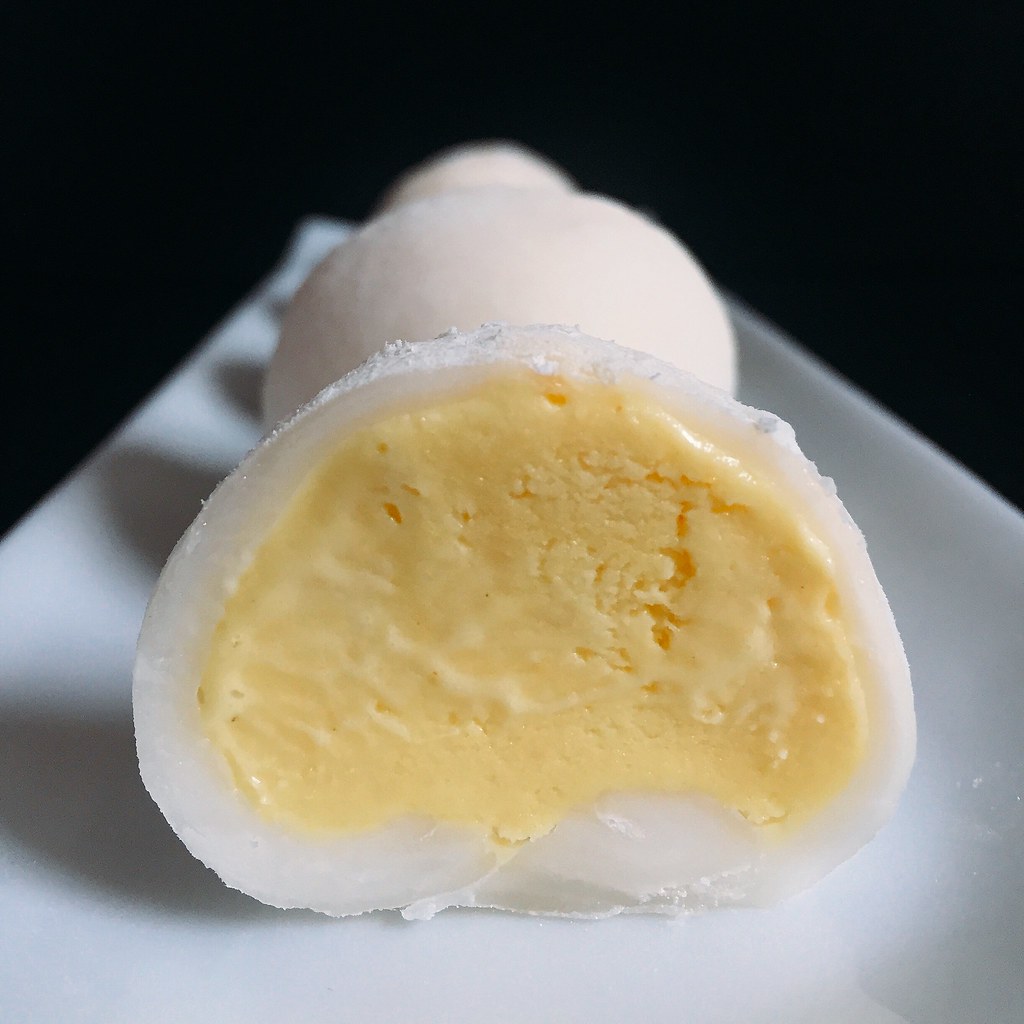
The resulting ice cream is incredibly rich, and tastes pretty much like the inside of a liu sha bao but in ice cream form. So I decided to try making it into mochi ice cream to continue down that path. I've tried making mochi ice cream before and that attempt was disastrous, to say the least, so this time I made sure to follow a trusted recipe. I'm happy to say that the one from Just One Cookbook worked marvelously. These salted egg yolk mochi ice creams are perfect because you only need a couple of bites of the ice cream, and the soft, chewy mochi helps keep the intense flavor from being too overwhelming. Plus, I think they look super cute and remind me of liu sha bao!
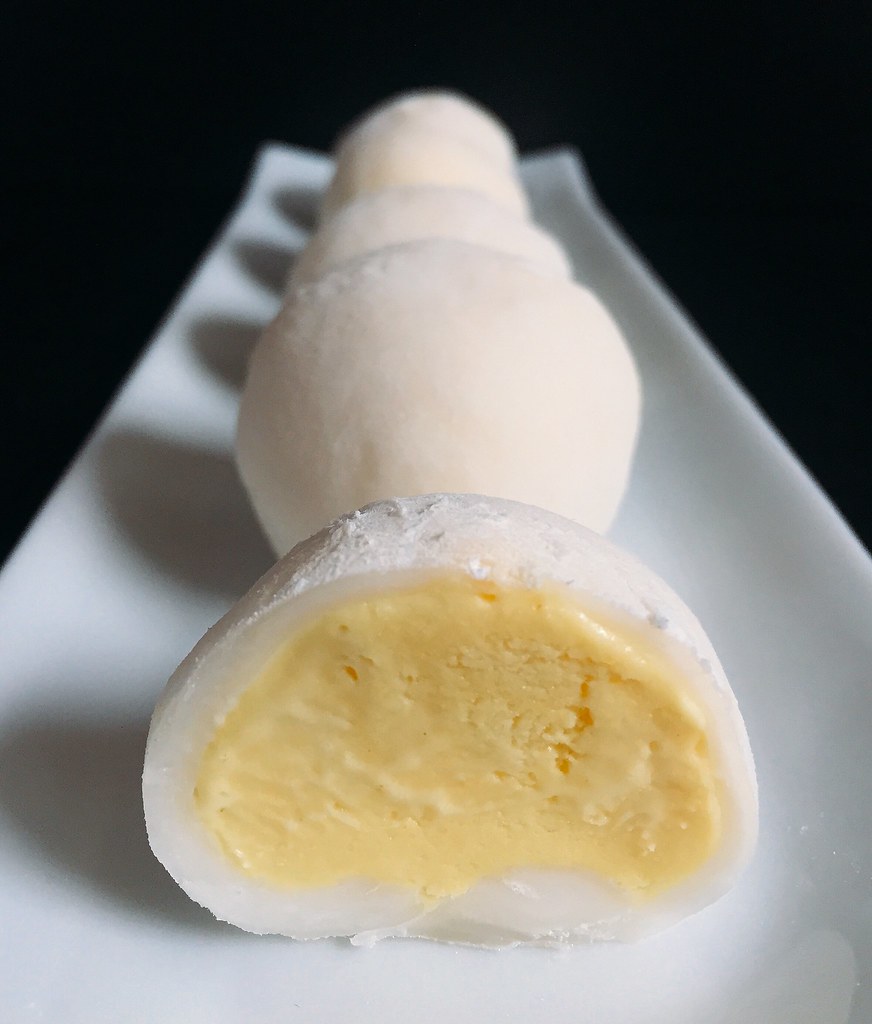
Salted Egg Yolk Ice Cream (adapted from Jeni's Splendid Ice Cream Desserts)
makes about 1 quart
3 cooked salted duck eggs
2 tablespoons cream cheese, softened
1/2 teaspoon kosher salt
1/8 teaspoon turmeric
2 3/4 cups whole milk
3 large raw egg yolks
1 tablespoon plus 2 teaspoons cornstarch
1 cup heavy cream
3/4 cup sugar
2 tablespoons light corn syrup
Carefully crack and peel the salted duck eggs, removing the whites until you are left with only the egg yolks. Mash the egg yolks in a medium bowl, then add the cream cheese, salt, and turmeric and whisk until smooth.
Mix about 2 tablespoons of the milk, the raw egg yolks, and cornstarch in a small bowl and set aside. Fill a large bowl with ice and water.
Combine the remaining milk, the cream, sugar, and corn syrup in a 4-quart saucepan, bring to a boil over medium-high heat, and boil for 4 minutes. Remove from the heat and gradually add about 2 cups of the hot milk mixture to the egg yolk mixture, one ladleful at a time, stirring well after each addition. Pour the mixture back into the saucepan and heat over medium heat, stirring constantly with a heatproof spatula, just until the mixture thickens. Remove from the heat and strain through a sieve if necessary.
Gradually whisk the hot milk mixture into the cream cheese mixture until smooth. Pour the mixture into a 1-gallon Ziploc freezer bag and submerge the sealed bag in the ice bath. Let stand, adding more ice as necessary, until cold, about 30 minutes.
Remove the frozen canister from the freezer, assemble your ice cream machine, and turn it on. Pour the custard base into the canister and spin until thick and creamy.
Pack the custard into a storage container. Press a sheet of parchment directly against the surface and seal with an airtight lid. Freeze in the coldest part of your freezer until firm, at least 4 hours.
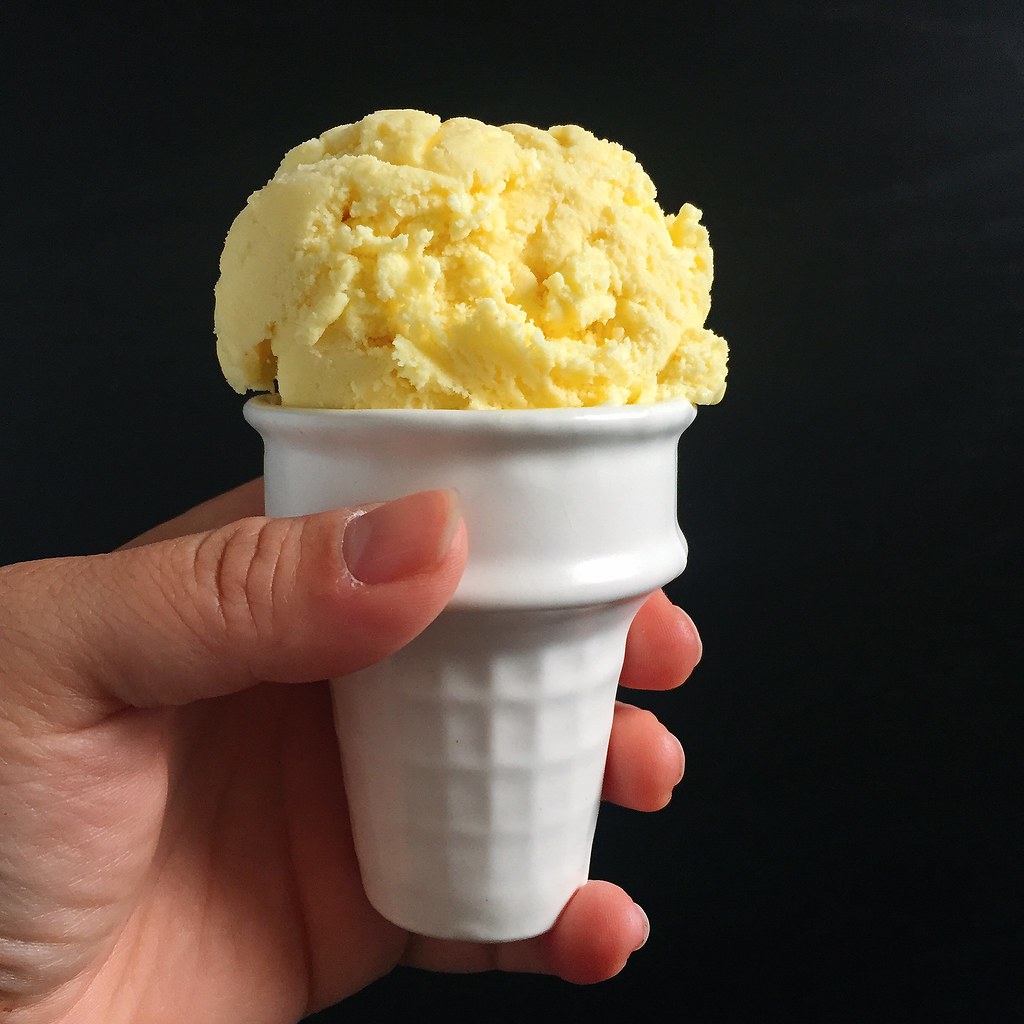
Mochi Ice Cream (adapted from Just One Cookbook)
makes about 6-8 pieces
Ice cream
3/4 cup glutinous rice flour
1/4 cup sugar
3/4 cup water
1/2 cup cornstarch
Place a cupcake pan in the freezer to chill. Use a cookie dough scooper to scoop 6-8 balls of ice cream. Place each ball on an aluminum cupcake liner in the cupcake pan and freeze for several hours until hard.
Whisk together the glutinous rice flour, sugar, and water in a medium microwaveable bowl. Cover and microwave for 30 seconds. Stir with a wet rubber spatula then microwave for another 30 seconds. Continue to stir and microwave in 30 second increments until the mochi comes together in a slightly translucent, sticky mass.
Generously dust a Silpat or parchment paper with cornstarch. Transfer the mochi on top and dust with additional cornstarch. Dust a rolling pin with cornstarch and roll out the mochi into a thin layer, about 1/8". Chill in the refrigerator for 15 minutes.
Use a 3 1/2" cookie cutter to cut the mochi into circles. I was able to easily cut out 6 circles, and if you want, you can reroll the scraps to make more circles, just make sure to redust with cornstarch.
Place one of the scoops of ice cream in the center of a mochi circle. Bring the edges of the mochi up and over the ice cream and seal together, working quickly so that the ice cream doesn't melt. Wrap in plastic wrap and return to the freezer. Repeat with the other scoops of ice cream and mochi circles.
When ready to eat, let sit at room temperature for a few minutes so that the mochi can soften.
Next: French Onion Tater Totchos
Previously: Marion Cunningham's Yeast-Raised Waffles
Two Years Ago: San Bei (Taiwanese Three Cup) Tofu and Ramen
Three Years Ago: Grilled Cheese Egg in a Hole
Four Years Ago: Homemade Bagels
Seven Years Ago: Sweet Potato Gnocchi with Maple Cinnamon Sage Brown Butter
Eight Years Ago: Dutch Babies
Wednesday, January 4, 2017
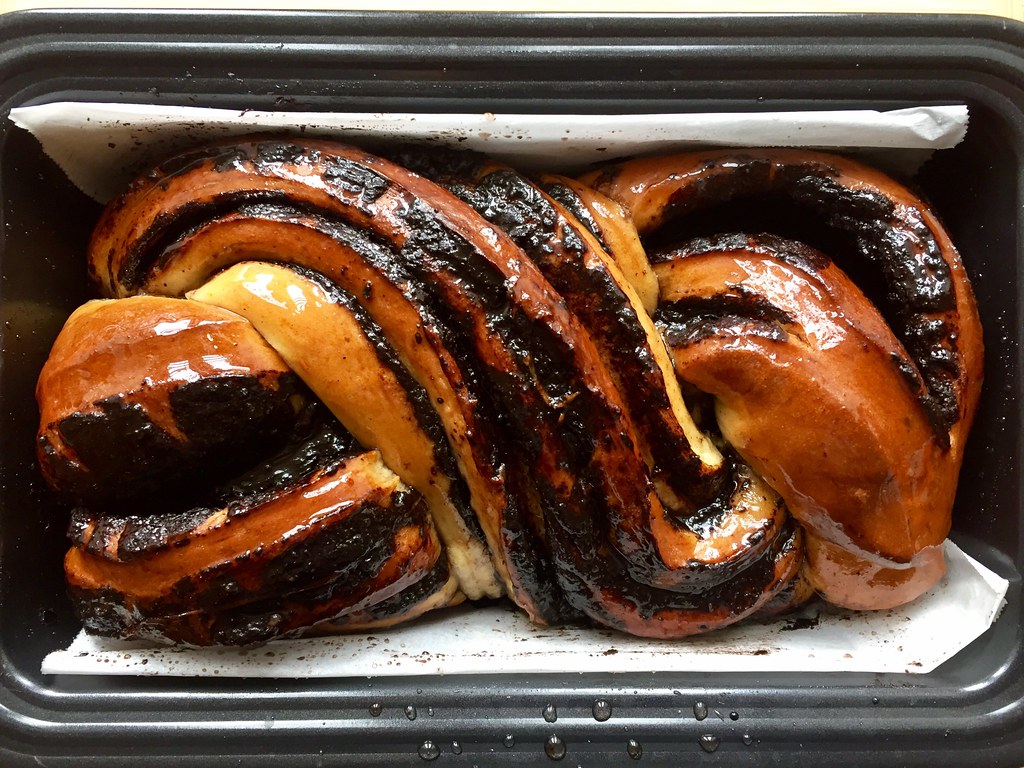
Chocolate Babka
Last year I had the smart idea to try making a matcha babka wreath with milk bread dough. In my head it would be pretty, and green-tinged, and perfect for the holidays. In reality, it was dense, ugly, and I ended up throwing it out.
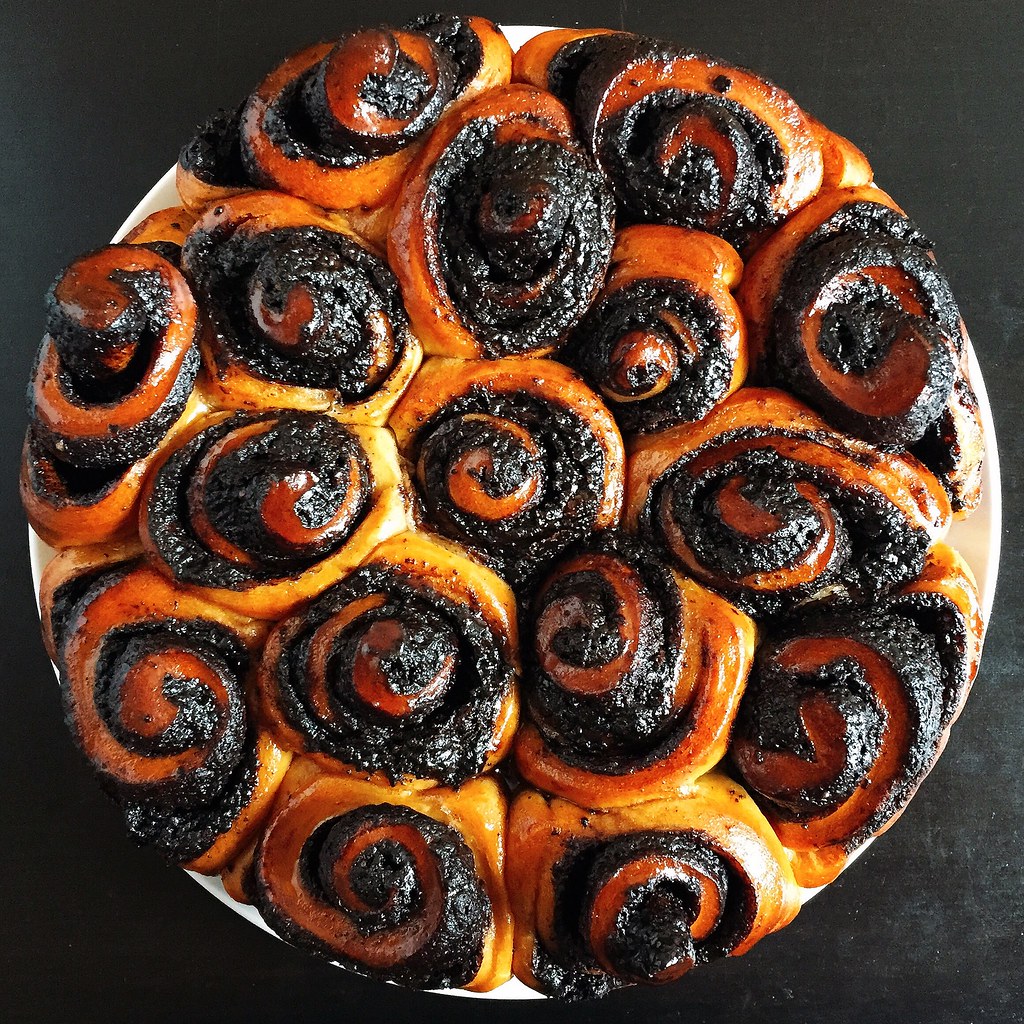
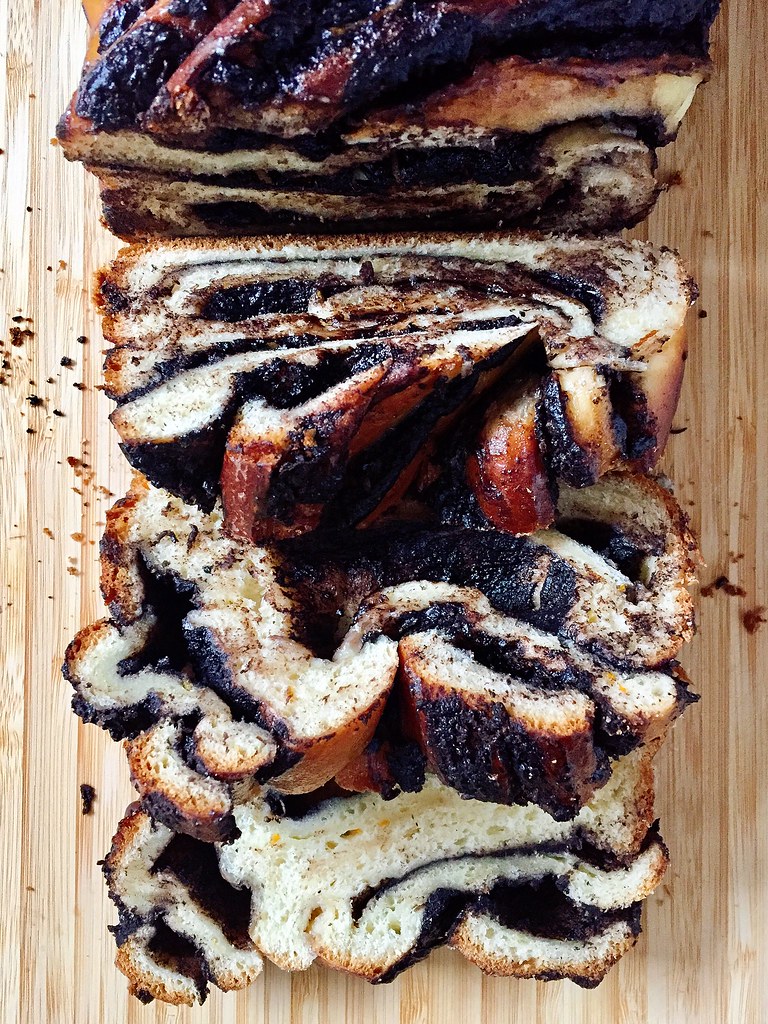
This year I decided to follow this tried-and-true recipe for chocolate babka from Smitten Kitchen. The only change I made to the ingredients is that I used the zest from a whole orange instead of half an orange, and the smells that came out of my oven were glorious. I also tried shaping it using what I remembered from the pictures in the Baking Breads cookbook.
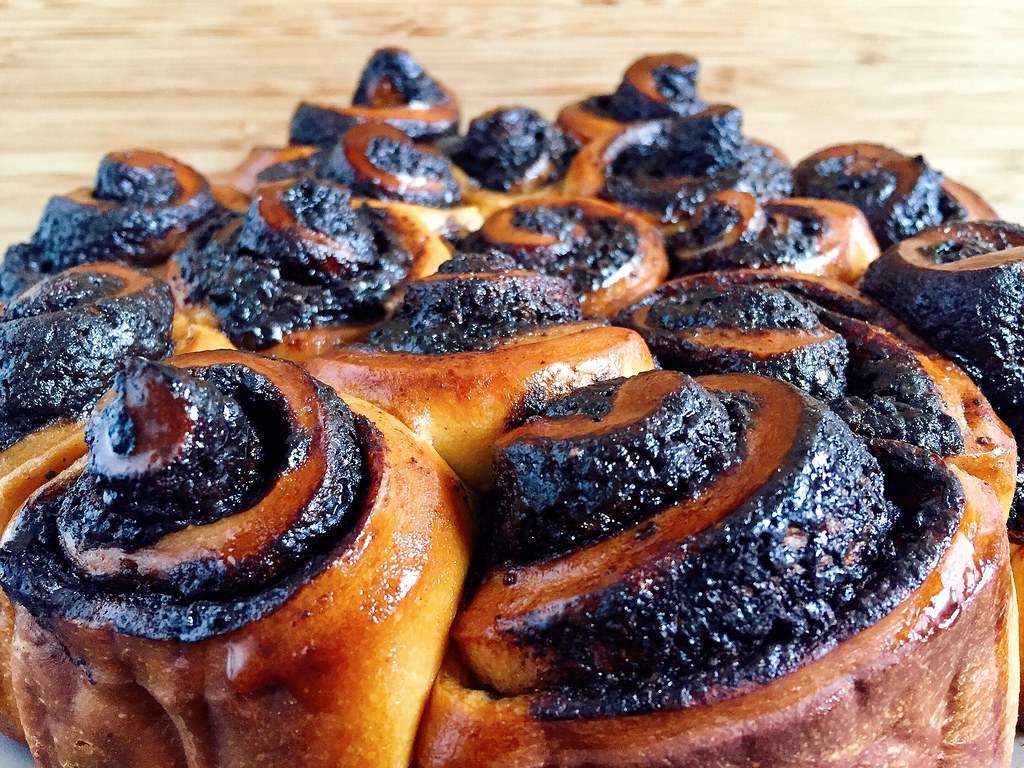
Since the recipe makes two loaves, I decided to give one of the loaves the "pull-apart swirly bread" treatment. If you'd like to try it, roll out a quarter of the dough (half a loaf) into a rectangle about 10" wide and as long as you can get it. Spread with 1/4 of the filling and roll it up along the long edge. Seal the seam and place in the freezer for 15 minutes while you repeat the same with the other quarter of dough. Slice each log into 8 pieces, and arrange all 16 pieces in a well-greased 9" springform or square pan. Let rise for an hour and then bake for 25-30 minutes at 375°F until nicely browned. Brush with syrup and serve.
makes 2 loaves
For the dough:
1 packet (2 1/4 teaspoons) active dry yeast
1/2 cup warm water (about 100 F)
4 1/4 cups all-purpose flour
1/2 cup sugar
1 teaspoon kosher salt
Zest from 1 orange
3 large eggs
11 tablespoons unsalted butter, softened
For the filling:
3/4 cup semi-sweet chocolate chips
1/2 cup unsalted butter
1/2 cup powdered sugar
1/3 cup cocoa powder
1/4 teaspoon cinnamon
For the syrup:
1/3 cup water
6 tablespoons sugar
Sprinkle the yeast over the warm water in the bowl of a stand mixer and let sit while you measure out the rest of the ingredients. Add all the ingredients for the dough except the butter and mix with a dough hook until it comes together. Add the butter, one tablespoon at a time, until it is all incorporated. Knead on medium until the dough is completely smooth and comes away from the bowl. Cover and refrigerate overnight.
The next morning, make the filling by melting the chocolate chips and butter together, stirring until smooth. Add the powdered sugar, cocoa powder, and cinnamon and stir until it forms a spreadable paste. Grease 2 loaf pans and line with parchment paper.
Remove half the dough from the refrigerator and roll out on a floured surface until 10" wide on the bottom and as long as you can get it. Spread the filling on top, leaving an inch border on all sides except the bottom. Roll up the dough in a tight spiral starting from the bottom. Wet the top edge and seal together. Wrap with aluminum foil and place in the freezer while you work on the second half of the dough.
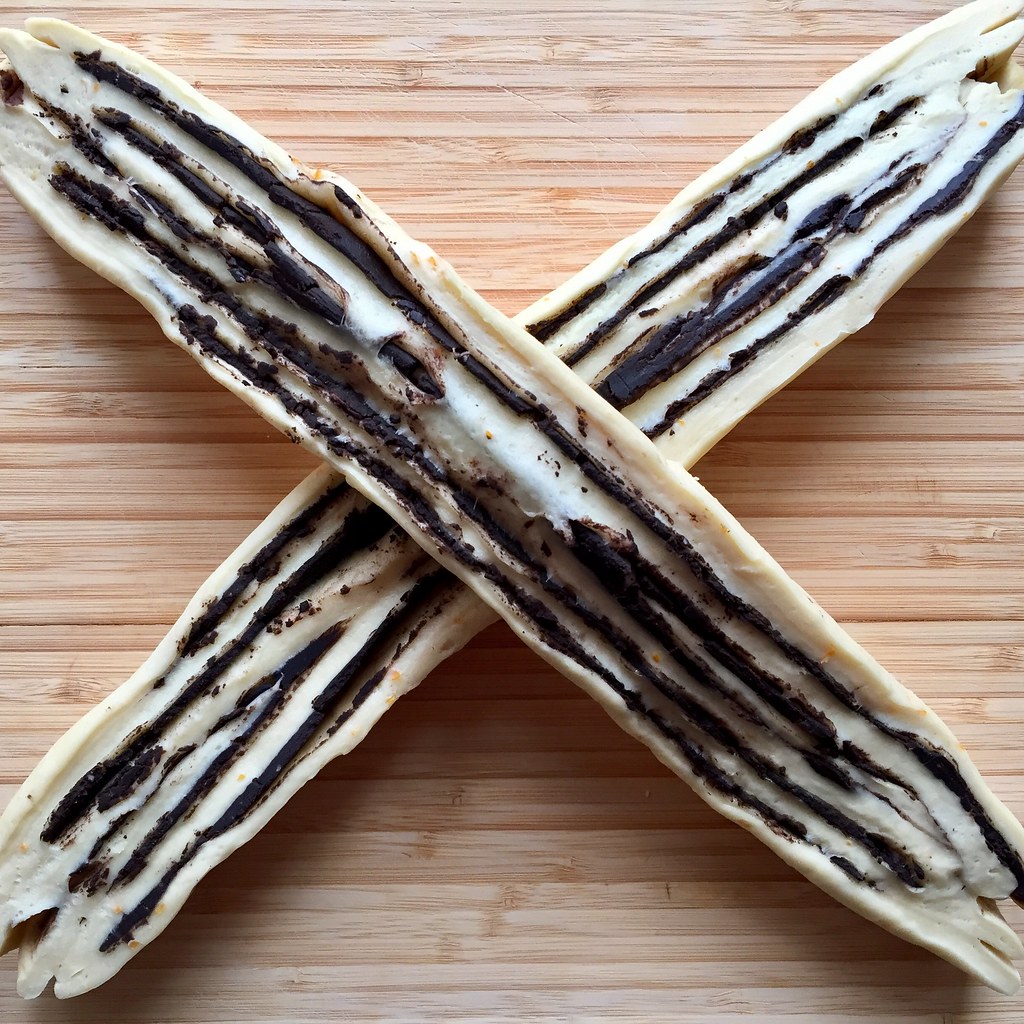
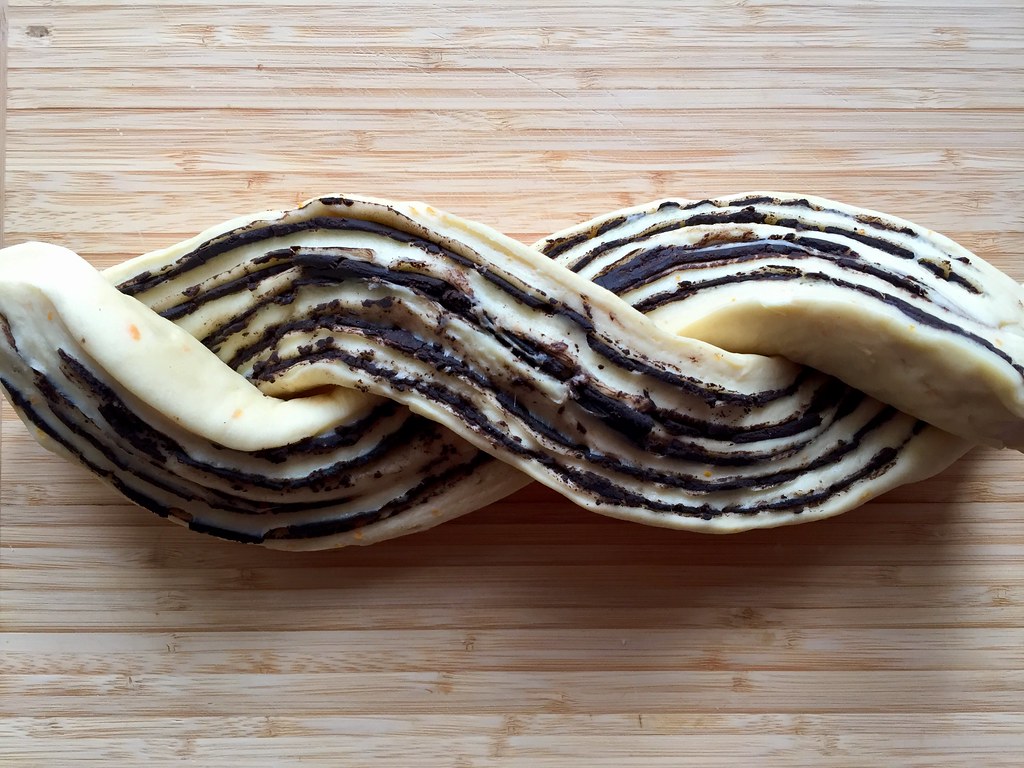
Remove the first log from the freezer and use a sharp knife to slice in half, lengthwise, revealing all the layers of dough and chocolate filling. Make an "X" with the two halves, placing the prettier half on top. Twist the top half and bottom half and place in one of the greased pans, tucking the ends underneath. Repeat with the second half. Cover both and let rise another hour. Preheat oven to 375°F.
Bake loaves for 25-30 minutes, until a skewer meets no resistance when inserted and comes out without any dough (it will most likely come out with some chocolate filling which is very tempting to lick).
While the babka is baking, make the syrup by combining the water and sugar in a small pot and heating until the sugar is all dissolved. Brush the loaves with the syrup as soon as they come out of the oven.
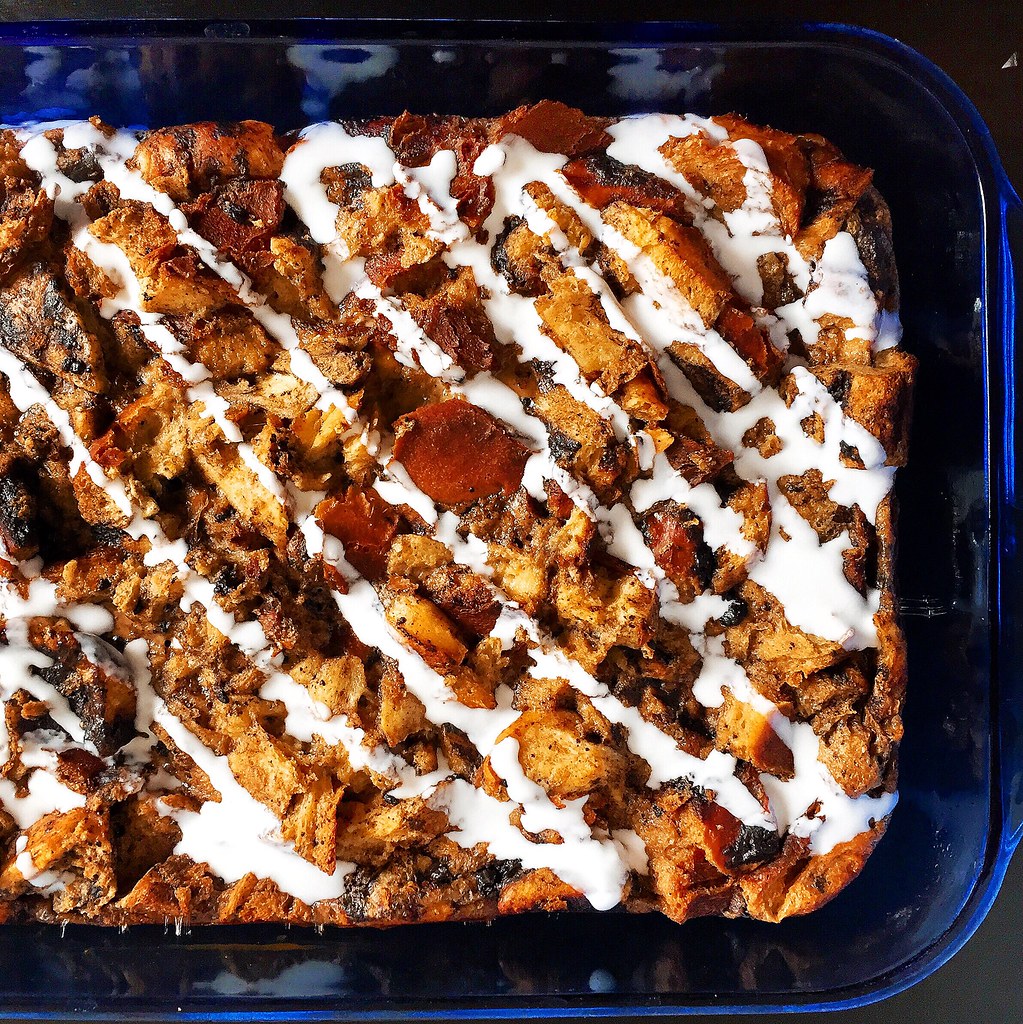
And if you manage to have any leftover babka, you can turn it into the most amazing bread pudding using this recipe from Serious Eats! (I just added some coconut milk on top for contrast.)
Next: Marion Cunningham's Yeast-Raised Waffles
Previously: Pull-Apart Scallion Swirly Bread
Two Years Ago: Zuppa Toscana
Three Years Ago: Flower Pavlovas
Four Years Ago: Tartine Lemon Cream Tart
Seven Years Ago: Gaufres de Liege (Belgian Waffles)
Eight Years Ago: Hua Juan
Monday, December 19, 2016
Shab-e Yalda (Winter Solstice) 2016 and a Recipe for Apple and Pear Faloodeh
Yalda, the ancient Persian festival of winter solstice is celebrated on the eve of the longest night of the year which also marks the beginning of the winter season in the northern hemisphere. Shab-e yalda (yalda night) festival dates back several thousands of years ago to the birth of Mithra, the light of the world and the god of justice and victory. It's a wonderful night when family and
Tuesday, December 13, 2016
Cranberry Curd Tart
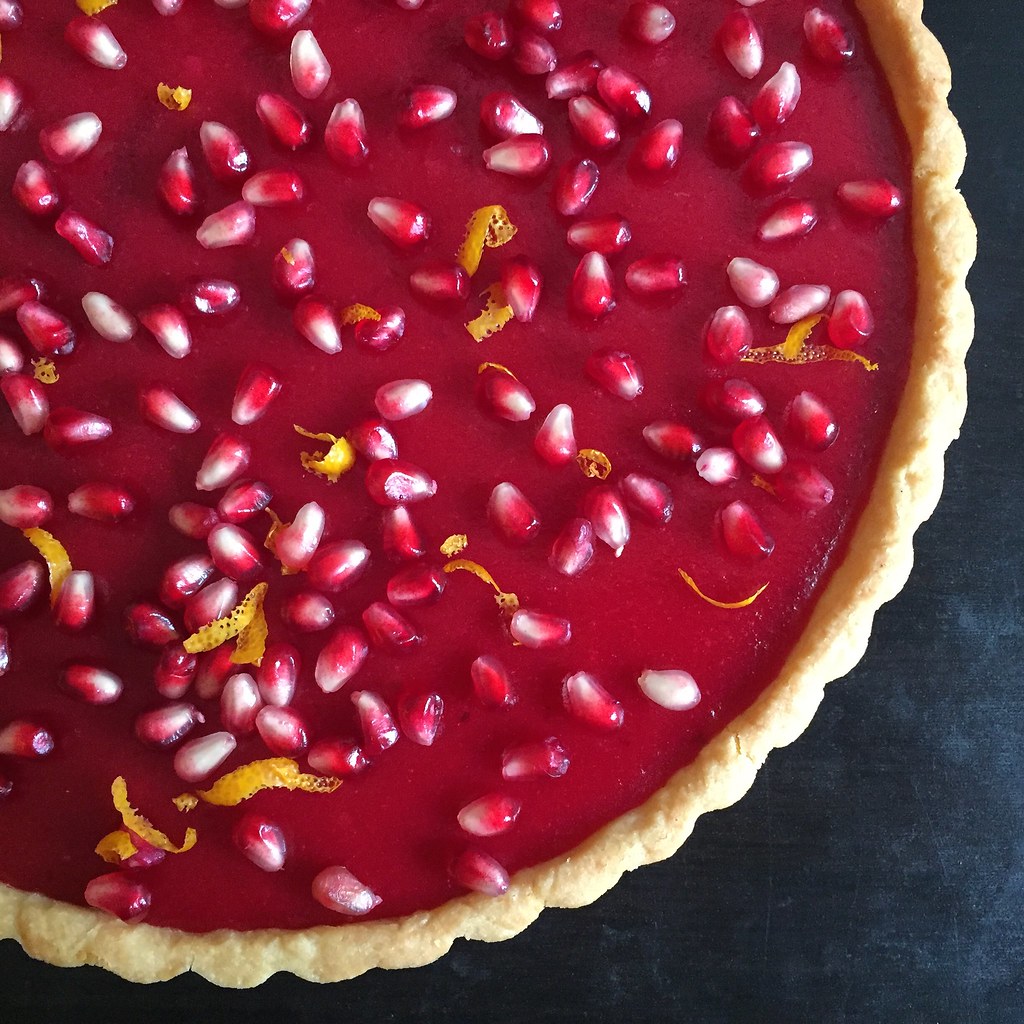
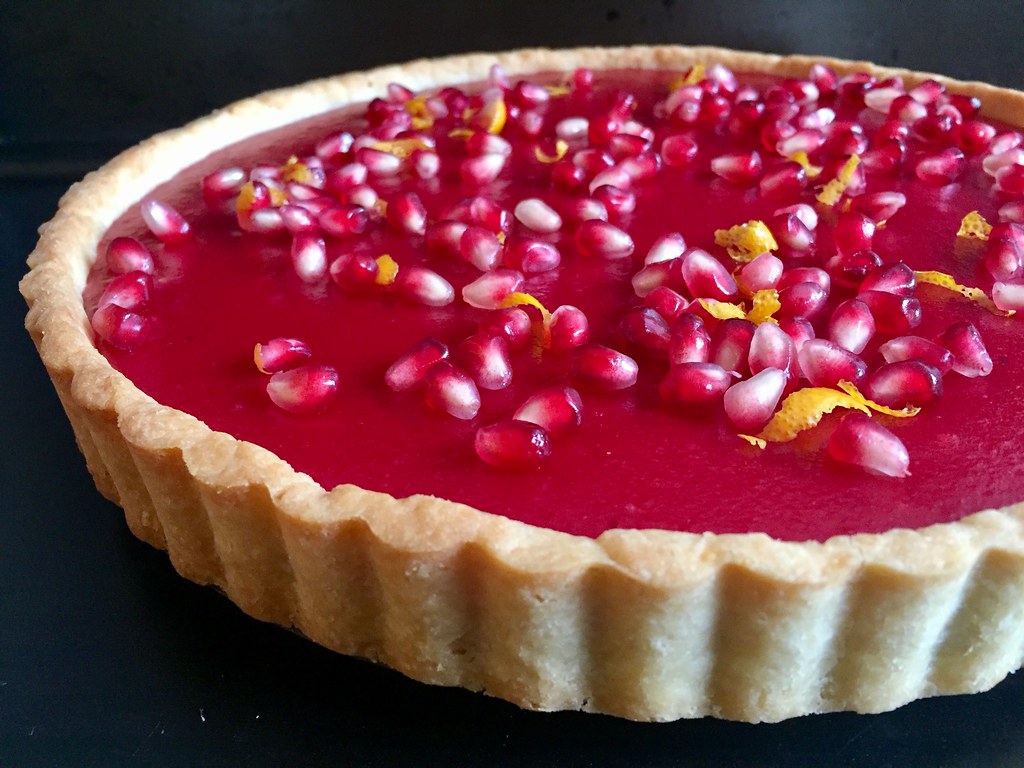
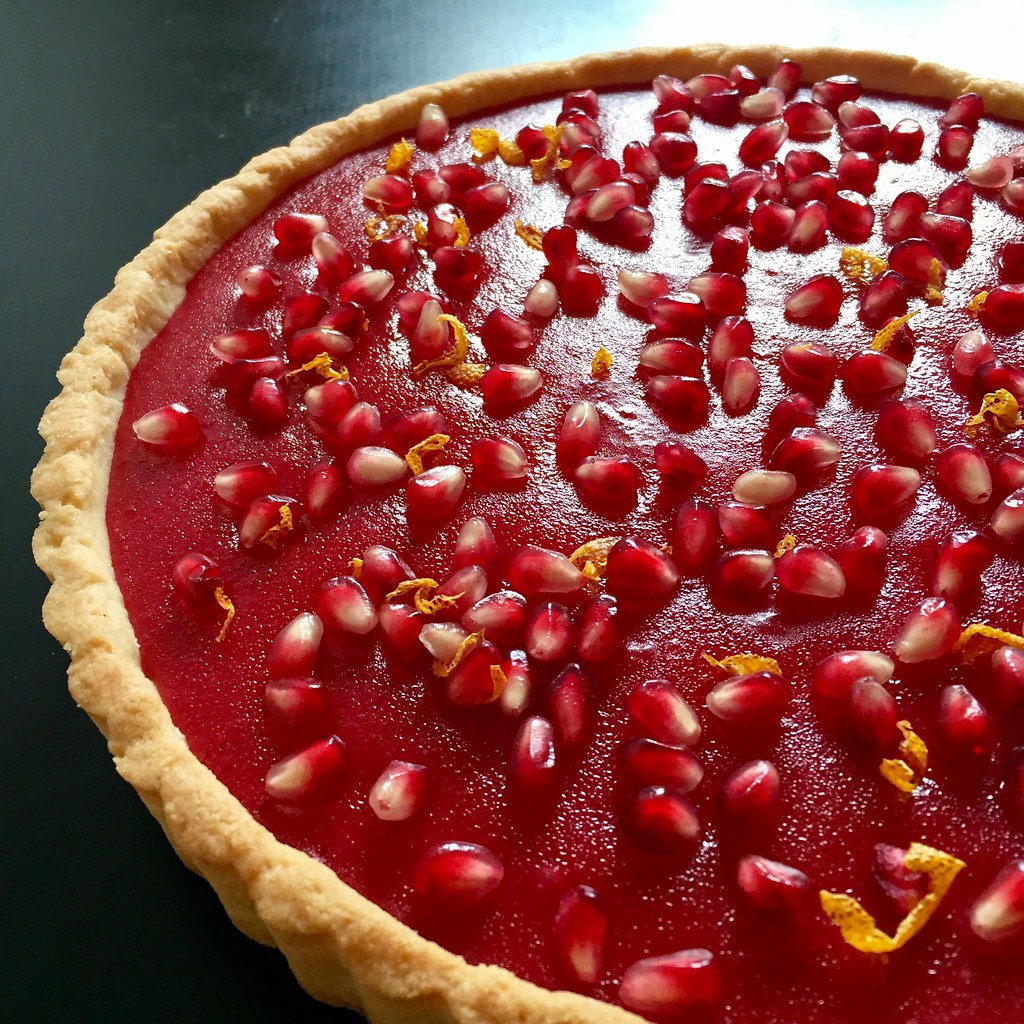
When I first saw NYT Food's Instagram post featuring a cranberry curd tart I knew I needed to make it if only because of how gorgeous it was. But each time I made it I couldn't figure out how to photograph it so that the picture would do it justice. Which meant I just kept making it over and over again. Awful, I know. Then this last time I got a pomegranate in my Boston Organics delivery and decided to try sprinkling some on top of the tart for some contrast, and it finally looked as good as it tasted! They also give the tart a little crunch and freshness to cut all the richness.
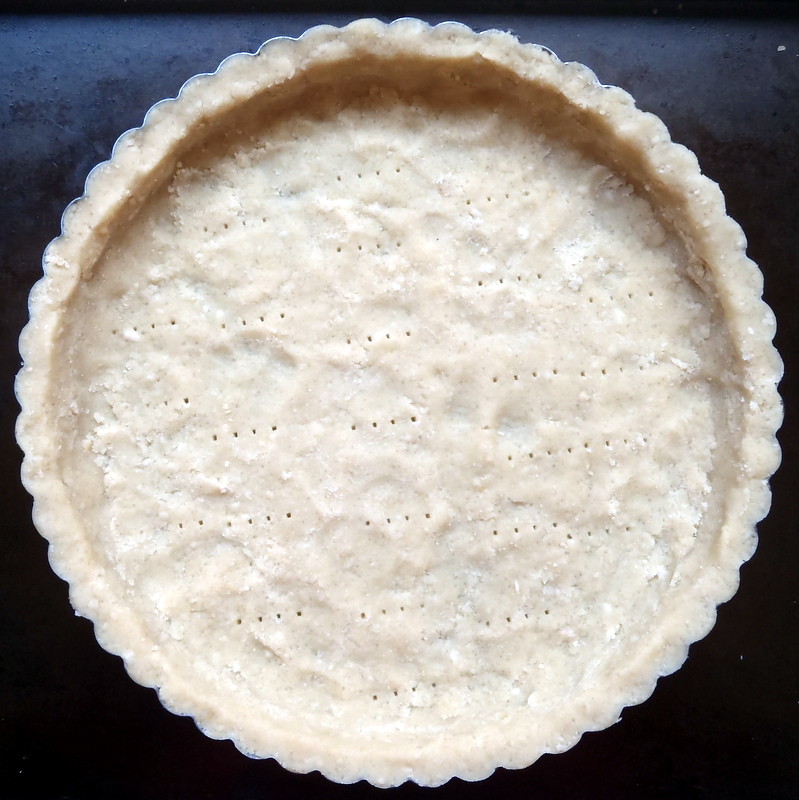
For the crust, instead of the using the hazelnut crust in the original recipe, I used Smitten Kitchen's "great unshrinkable sweet tart shell" because hazelnuts are expensive and it's pretty much a no-fail recipe. To save time and effort, I usually end up just pressing the dough into the tart pan right after making it (starting with the edges), docking it, and then freezing it for 30 minutes before blind baking it with the buttered aluminum foil on top. Feel free to use whatever tart crust you prefer, though, as long as it's blind baked beforehand. I can see Thomas Keller's pine crust tart crust being amazing for this recipe.
For the cranberry curd, make sure that you don't overcook it after adding the eggs, because the egg whites curdle really easily if the mixture gets too hot. Since it's kind of hard to tell when it starts to thicken, the sign I look for is when steam starts rising off the top. You definitely don't want the mixture to start bubbling, and it helps to keep stirring to distribute the heat.
Cranberry Curd Tart (adapted from The New York Times)
makes a 9" tart
Your favorite 9" sweet tart crust, blind baked
12 oz. cranberries
1 cup sugar
Juice and zest from 1 orange
1 stick unsalted butter, cut into pieces
2 eggs plus 2 egg yolk
Pomegranate arils, for garnishing (optional)
Heat the cranberries, sugar, orange juice, and zest in a large saucepan over medium heat. Cook until the cranberries have popped and softened, about 10 minutes. Transfer to a food mill or sieve and push the cooking liquid into a medium bowl. Place butter in the saucepan and pour the liquid back into the saucepan.
Whisk the eggs and egg yolks in the bowl, then add a couple of ladlefuls of the liquid into the bowl and whisk to temper the eggs. Pour everything back into the saucepan and cook over low heat, stirring constantly, until slightly thickened and steam just starts coming off. Cool to room temperature.
Preheat the oven to 350°F. Pour the cooled curd into the blind-baked tart crust. Bake for 10 minutes to set the curd. Allow to cool completely before garnishing with pomegranate arils.
Next: Pull-Apart Scallion Swirly Bread
Previously: Pear Apple Cranberry Slab Pie
Two Years Ago: Pull-Apart Thanksgiving Leftover Stuffed Bread
Three Years Ago: Thai Coconut Sticky Rice with Mango
Four Years Ago: Vanilla Passion Caramels
Seven Years Ago: Wah Guay (Taiwanese Rice Cake with Meat Sauce)
Wednesday, November 23, 2016
Pear Apple Cranberry Slab Pie
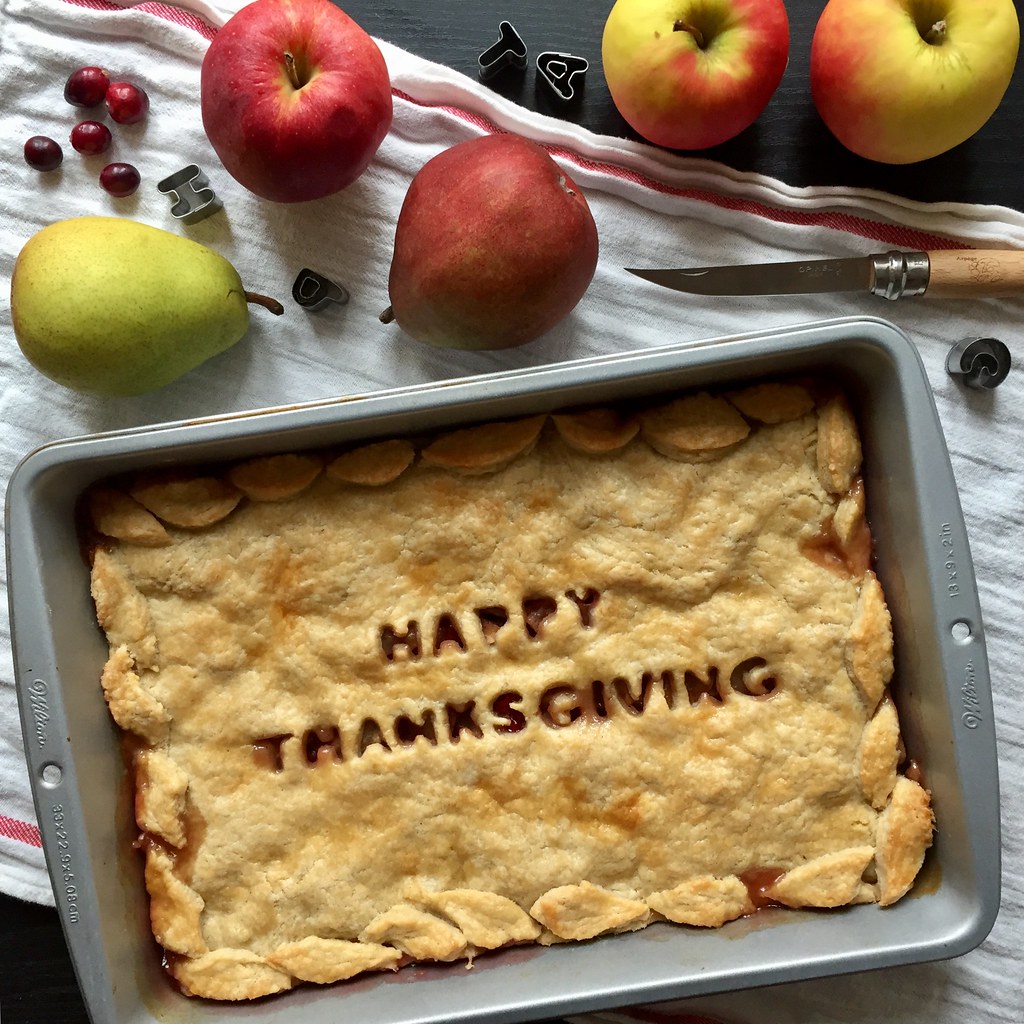
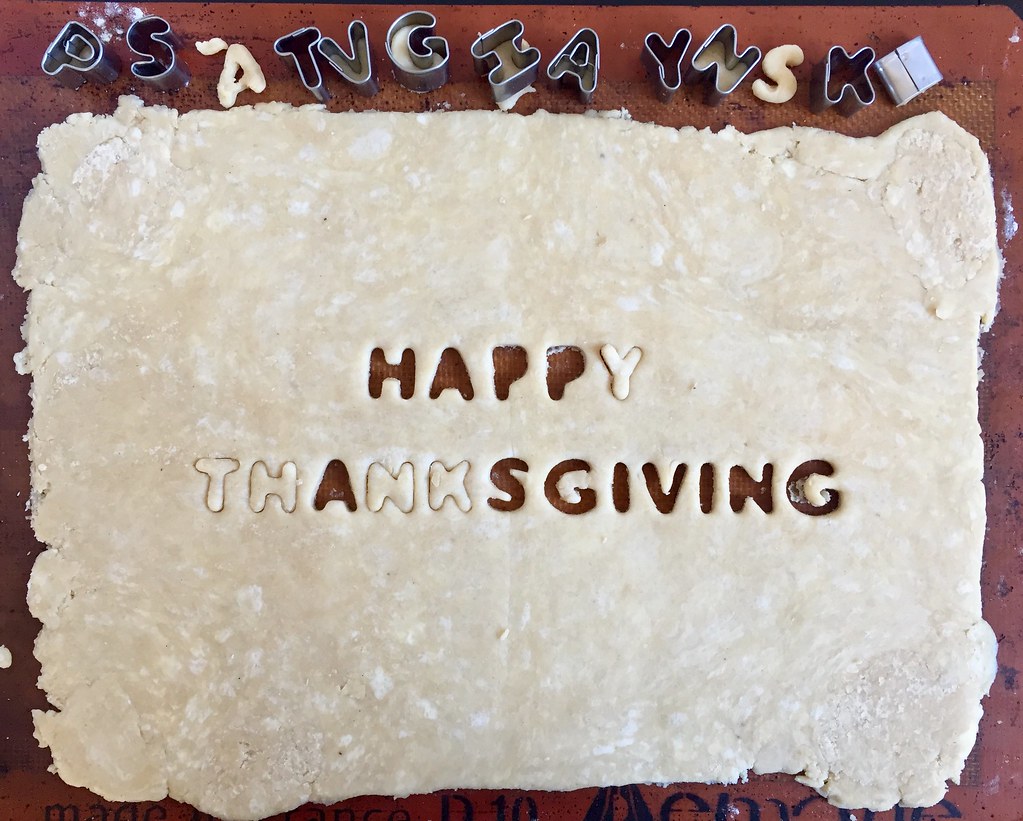
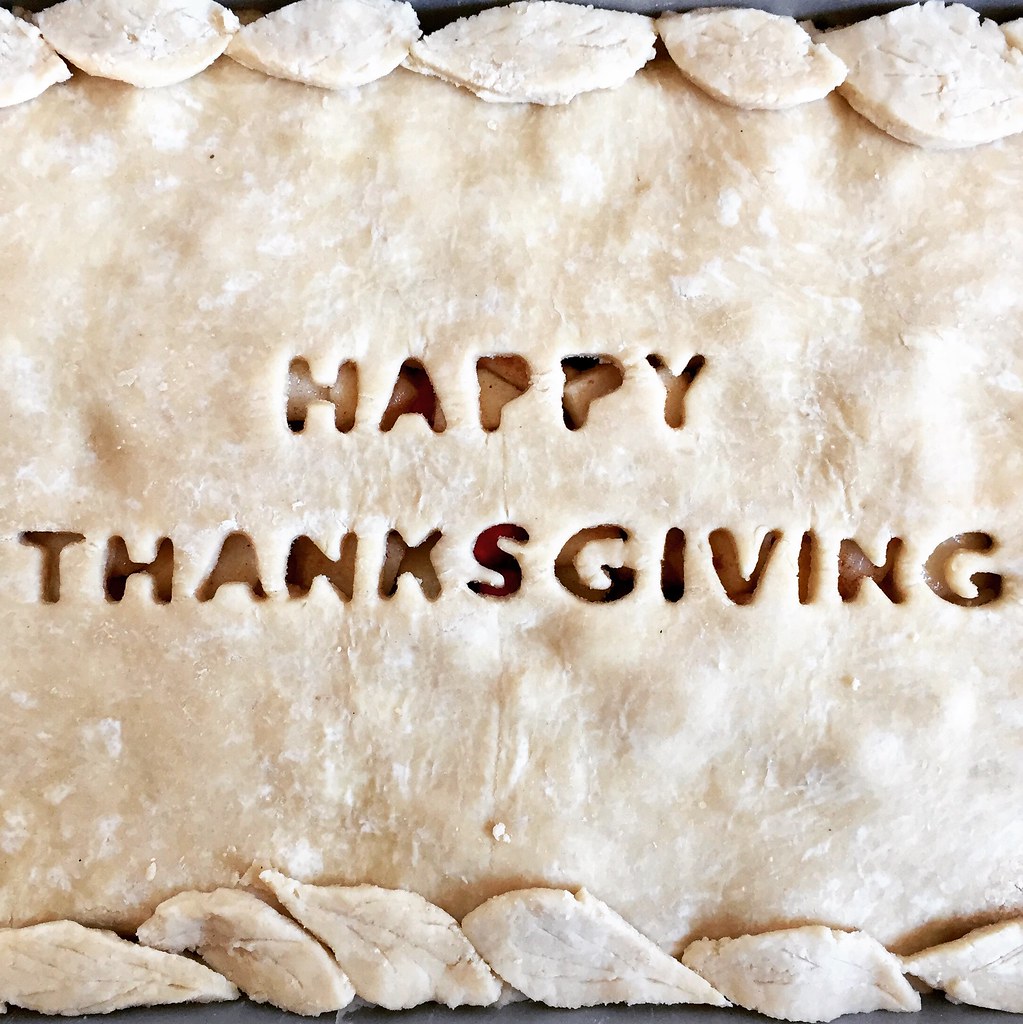
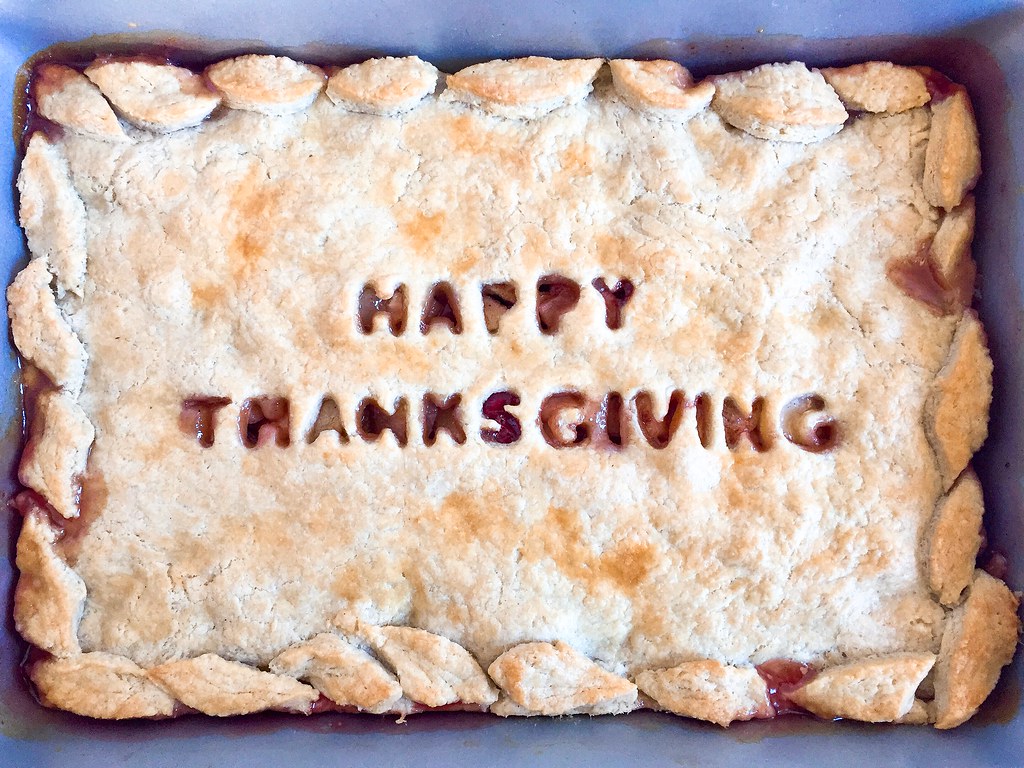
Sometimes you get an idea in your head that you just need to make a reality. This was one of those times. I already had alphabet cookie cutters from another project and a good slab pie recipe. I didn't have any leaf cookie cutters, but those were easy enough to freehand cut out of the dough.
For the filling I used up fruits that had been accumulating from my Boston Organics deliveries and ended up using 3 pears, 2 apples, and 4 oz. of cranberries, which I think ended up being about 5-6 cups of chopped fruit. I liked how the cranberries added a little tartness and color to the otherwise simply sweet filling. (If you want to add more than 4 oz. of cranberries, I would also up the amount of sugar to account for the additional tartness.)
I cheated a little and didn't make a bottom crust, but in the end I think that was a good call because it saved a lot of time and aggravation and really, no one likes the soggy bottom crust right? That meant I could make the top crust a little thicker and have plenty of dough left for the cut outs. If I had had the time, I would've added more leaves, but for my first attempt at pie dough decorations, I think it went pretty well. =)
Pear Apple Cranberry Slab Pie
makes a 9" x 13" slab pie
2 cups all-purpose flour, divided
2 tablespoons sugar
3/4 teaspoon kosher salt
12 tablespoons cold, unsalted butter, cubed
3 tablespoons ice water, more as needed
3 pears, peeled and chopped
2 apples, peeled and chopped
4 oz. fresh cranberries
3/4 cup sugar
1 teaspoon cinnamon
1 egg, beaten
Remove a heaping tablespoon of flour from the 2 cups and reserve for the filling. Mix the remaining flour, sugar, and salt together in a food processor. Add the butter and pulse until the butter has been cut into pea-sized pieces. Add the water and pulse to combine. Add more water if needed, a teaspoon at a time, just until the dough comes together. Form the dough into a disc, wrap with plastic wrap, and refrigerate for at least 30 minutes or overnight.
Preheat the oven to 400°F.
Place the chilled dough on a large piece of floured parchment paper or Silpat and roll the dough out to a 9" x 13" rectangle about 1/6" thick. You should have enough leftover dough to make cut outs from. Cover and return to the refrigerator while you prepare the filling.
Mix the sugar with the reserved flour and cinnamon, Toss with the chopped pears, apples, and cranberries. Pour into a 9" x 13" baking pan.
Decorate the pie dough as you like and place it over the fruit. Make an egg wash by mixing the beaten egg with 1 tablespoon of water. Brush the entire crust with the egg wash. Bake for 20 minutes, then rotate and bake for another 20 minutes or until golden brown.
Next: Cranberry Curd Tart
Previously: Soy Garlic Glazed Korean Fried Cauliflower
Last Year: Pad Thai
Two Years Ago: Raindrop Cake
Three Years Ago: My Mom's Taiwanese Sticky Rice
Four Years Ago: Duchikey (Simplified Turkducken)
Seven Years Ago: Nanaimo Bars
Eight Years Ago: Homemade Crystallized Ginger
Monday, October 10, 2016
Easy Mini Pumpkin Cinnamon Rolls
If you just can't get enough pumpkin flavor.
These mini rolls are a yummy treat
with your morning coffee.
Not really a recipe so mush as a few
simple instructions.
You need a tube of crescent rolls, pumpkin
butter, brown sugar, and pumpkin spice or
cinnamon. I found the pumpkin butter at
Trader Joe's.
butter, brown sugar, and pumpkin spice or
cinnamon. I found the pumpkin butter at
Trader Joe's.
Unroll the dough and press the seams together.
Spread evenly with pumpkin butter. Sprinkle
evenly with brown sugar and pumpkin spice.
You really don't need to measure
anything. Just eyeball it.
Cut into rounds. Dental floss works great for this.
Be sure it's unscented, of course. Put into
a greases pie dish.
Bake until golden. Glaze with frosting if desired.
Mini Pumpkin Cinnamon Rolls
1 tube crescent rolls
¼ C pumpkin butter
3 T brown sugar
1 t pumpkin spice or cinnamon
~~~~~~~~~~~~
1. Preheat oven to 375 degrees F.
2. Unroll dough into one large rectangle,
pressing seams to close.
3. Spread pumpkin butter evenly over the dough.
4. Evenly sprinkle brown sugar.
5. Evenly sprinkle with pumpkin spice or cinnamon.
6. Starting with short side of the rectangle roll up
into a log. Using string, dental floss, or a serrated
knife, cut the roll into 10 sliices. Place slices, cut
side down, in a greased in a 8 x 8 pan or a pie dish.
7. Bake 14-18 minutes or until golden brown.
Let cinnamon rolls cool in pan for 5 minutes.
8. While the cinnamon rolls are cooling, make the
cream cheese frosting. In a medium bowl, stir
together cream cheese and butter until smooth.
Whisk in the confectioner's sugar, vanilla, and
milk. If the frosting is still too thick, add a
little more milk and whisk until smooth.
9. Spread frosting over cinnamon rolls and serve!
Frosting
½ C powdered sugar
1 T butter, soft
1 T cream cheese, soft
1 t milk (enough to thin)
a few drops of vanilla
Enjoy!
tip: You can also try this using apple butter.
Links: Between Naps On The Porch
Sunday, July 3, 2016
How to Make an American Flag Cake
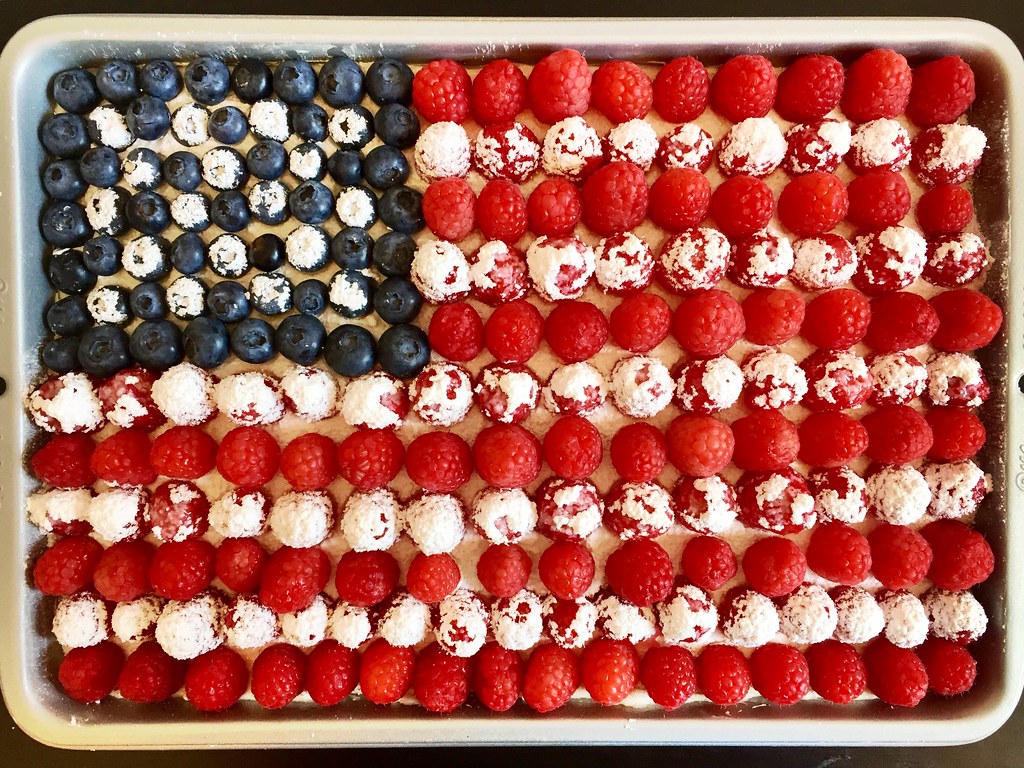
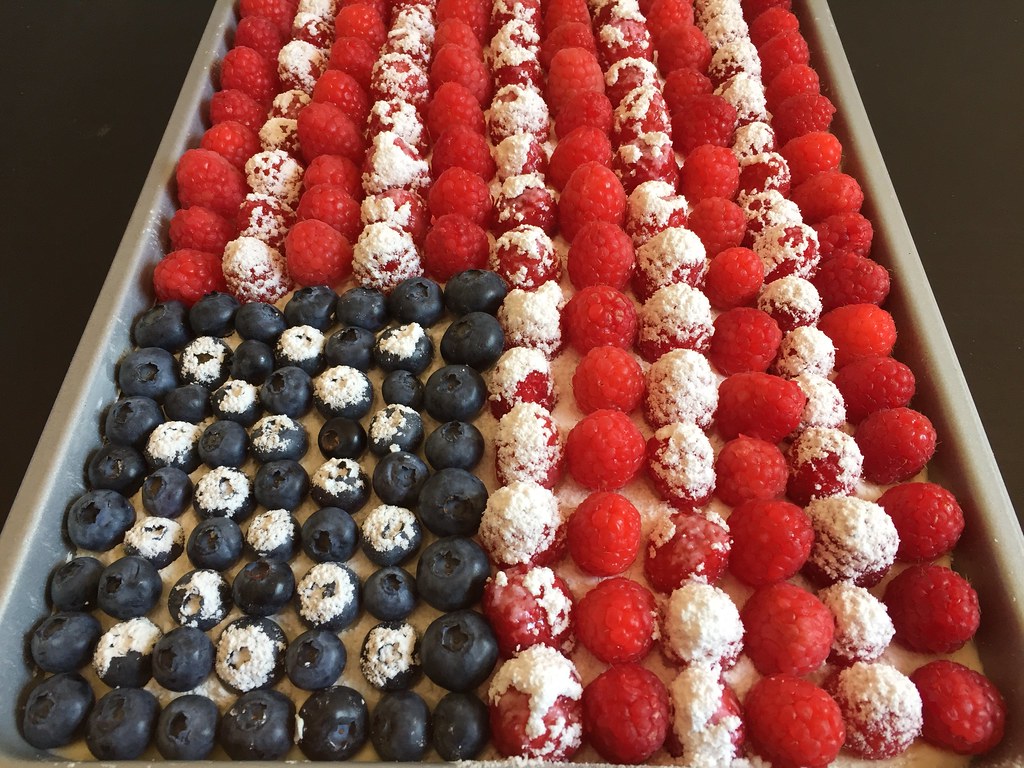
I've been wanting to make an American flag cake for the 4th of July and had pinned several possible versions including this one from Food52 and this ice cream cake version from the Food Network. But the problem with those round layer cakes though is that I only had one round cake pan and no way to transport the finished product. I wasn't too keen on having to pull out my piping bag to make Ina Garten's (or as Brit + Co called it, Taylor Swift's) version either, so when I came across Smitten Kitchen's version from four years ago, I was truly smitten. Not only was it a single layer rectangular cake, but all you needed was some powdered sugar to make the "stars" and stripes!
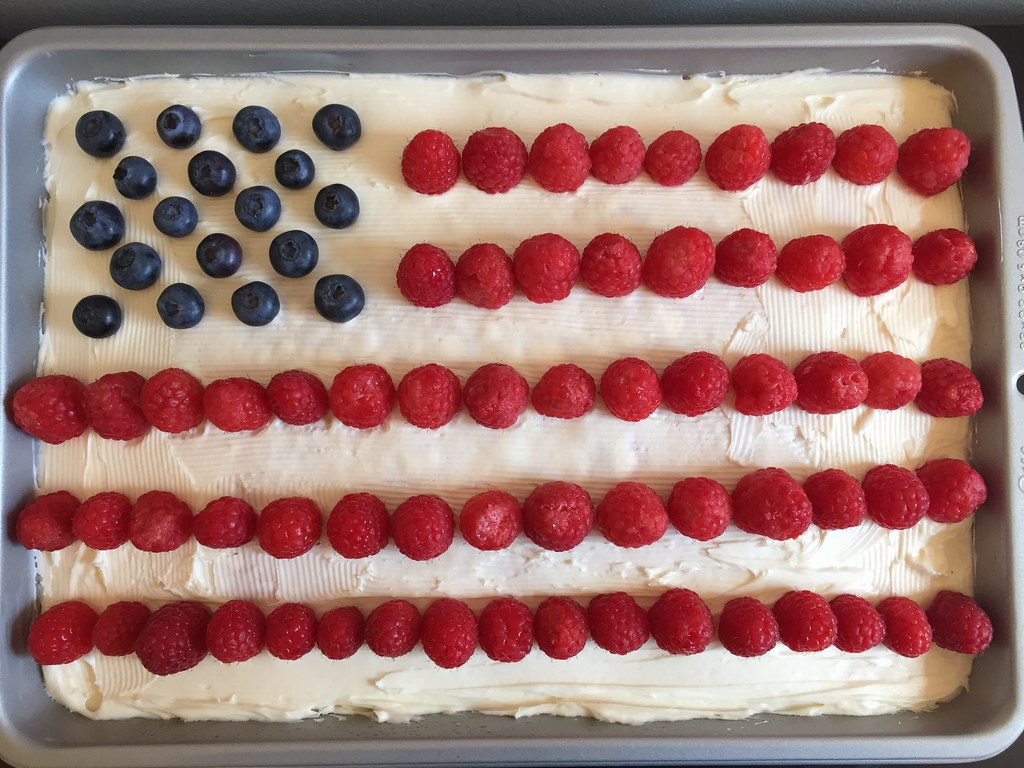
In her post, she includes a recipe for the cake and frosting, but I cheated by making the cake with a box mix and using store bought frosting. After baking the cake, allow it to cool completely before frosting. If it's domed on top, you can level it with a serrated knife or just do as I did and "spackle" in the sides with frosting so the top is level.
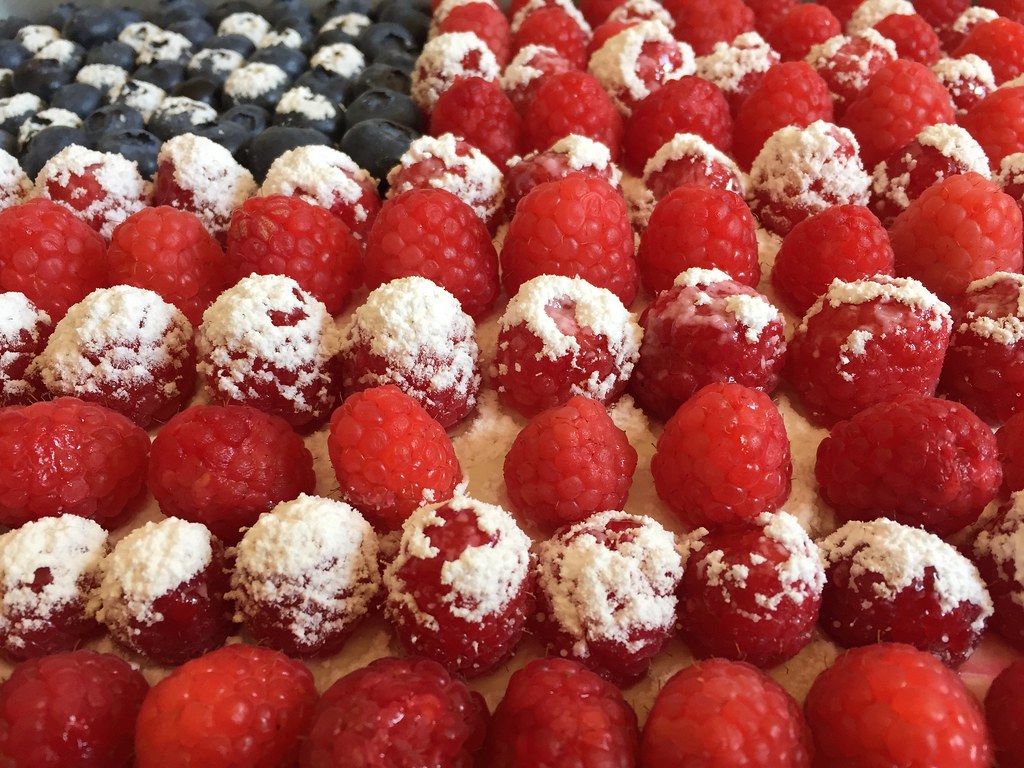
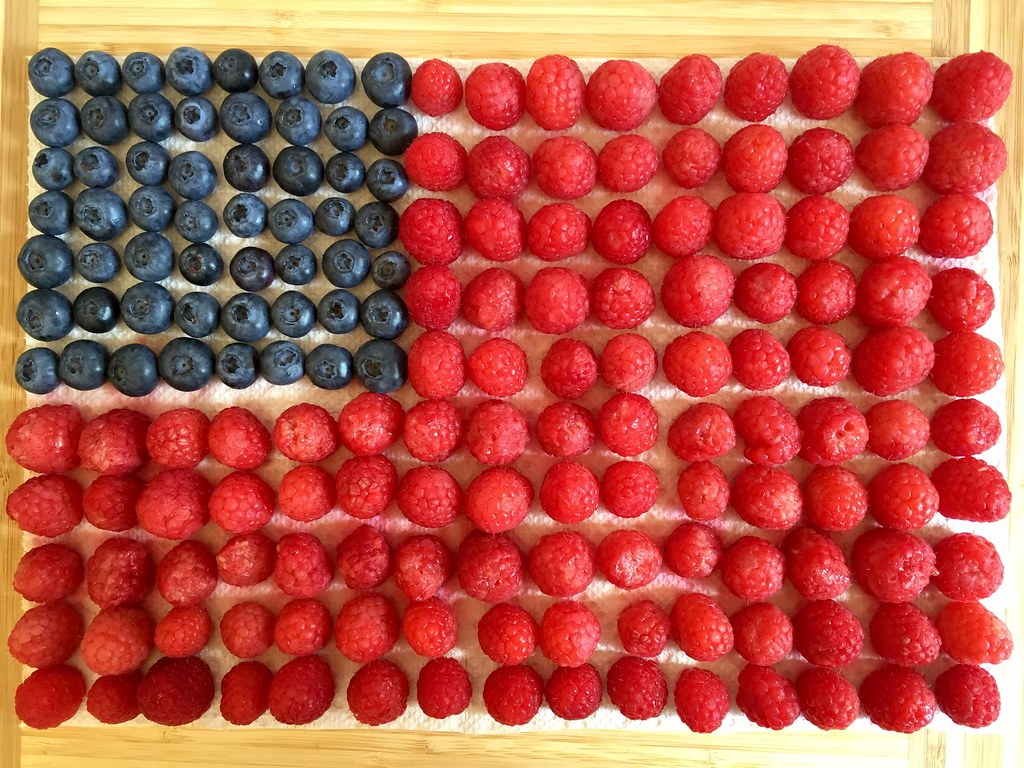
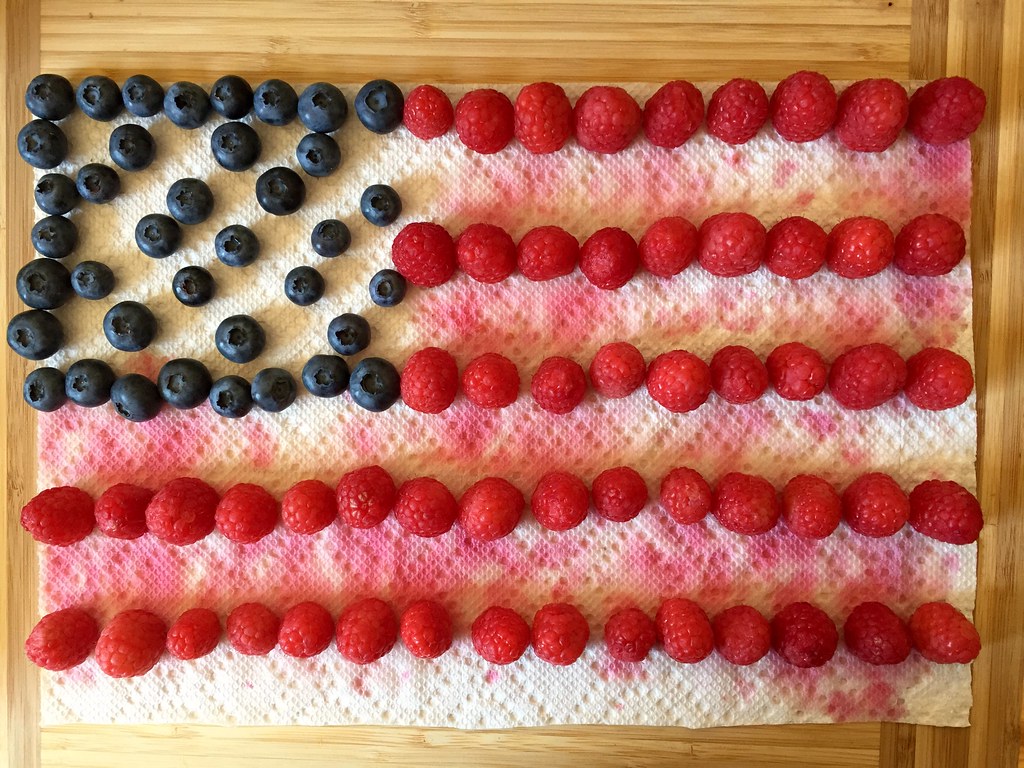
While the cake is baking, wash and dry the berries. While the cake is cooling, you can start arranging the berries to make sure you have enough. I used a piece of paper towel that was the same size as the cake to plot out the berries on. The blue part takes up about half the short side of the flag and extends about a third of the way across. There are 13 stripes (one for each of the original colonies; yay AP American History!) but you probably won't be able to fit that many on the cake. If you can, try to make an odd number of stripes so that the top and bottom stripe will be red.
After frosting the cake, start putting the berries that you want to appear white on the cake, leaving room for the other berries.
Dust these with powdered sugar, then arrange the rest of the berries into the spaces left for them.
In reality, it took a lot longer to make than I thought. The first batch of raspberries I bought were overripe and broke apart when I was washing them, so I had to go back to the store to buy another pint. Then I made the mistake of not completely drying the raspberries before decorating the cake, so the powdered sugar started to melt before I could even take any pictures. But if you learn from my mistakes, it's actually not that hard to make and totally worth it! Not only is it super impressive to bring to a party, the fresh fruit on top of the cake is really, really delicious!
Fun fact: if you can someone figure out how to make the starburst design, you can also use this template to make the Taiwanese (or more accurately, the R.O.C.) flag!
Next: My Mom's Beef and Broccoli Stir Fry
Previously: Maine Blueberry Gateau
Last Year: Pasta con le Sarde
Two Years Ago: Papaya Milk and Papaya Milk Popsicles
Three Years Ago: Bubble Tea Popsicles
Six Years Ago: Coconut Lime Sorbet
Thursday, June 23, 2016
Maine Blueberry Gateau
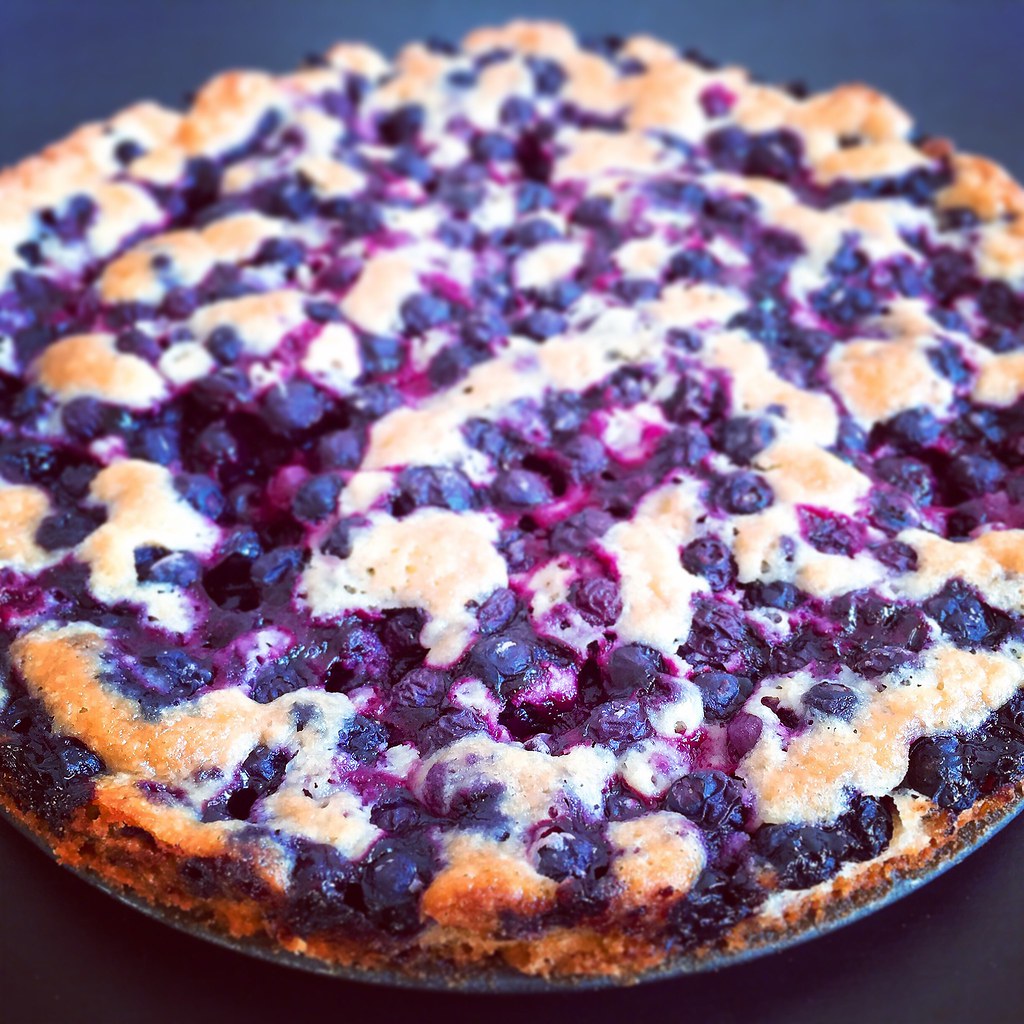
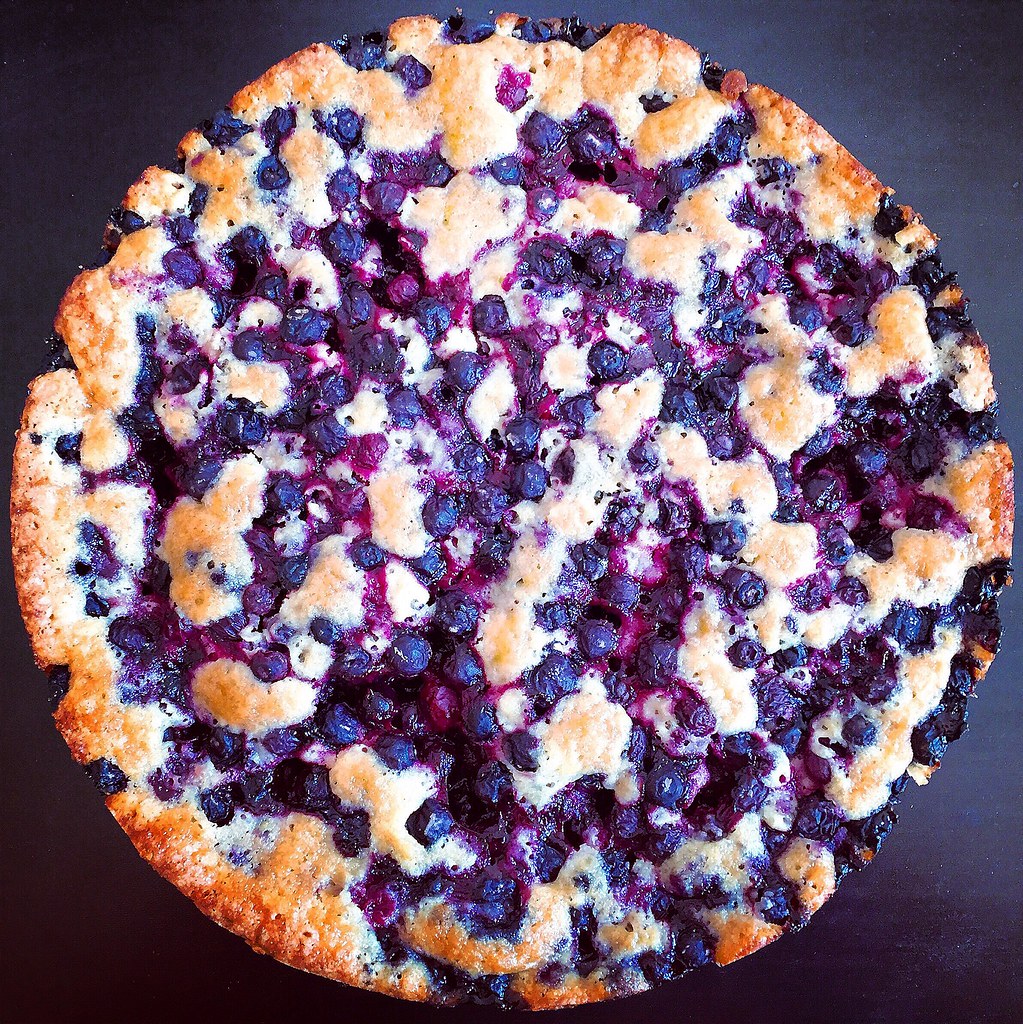
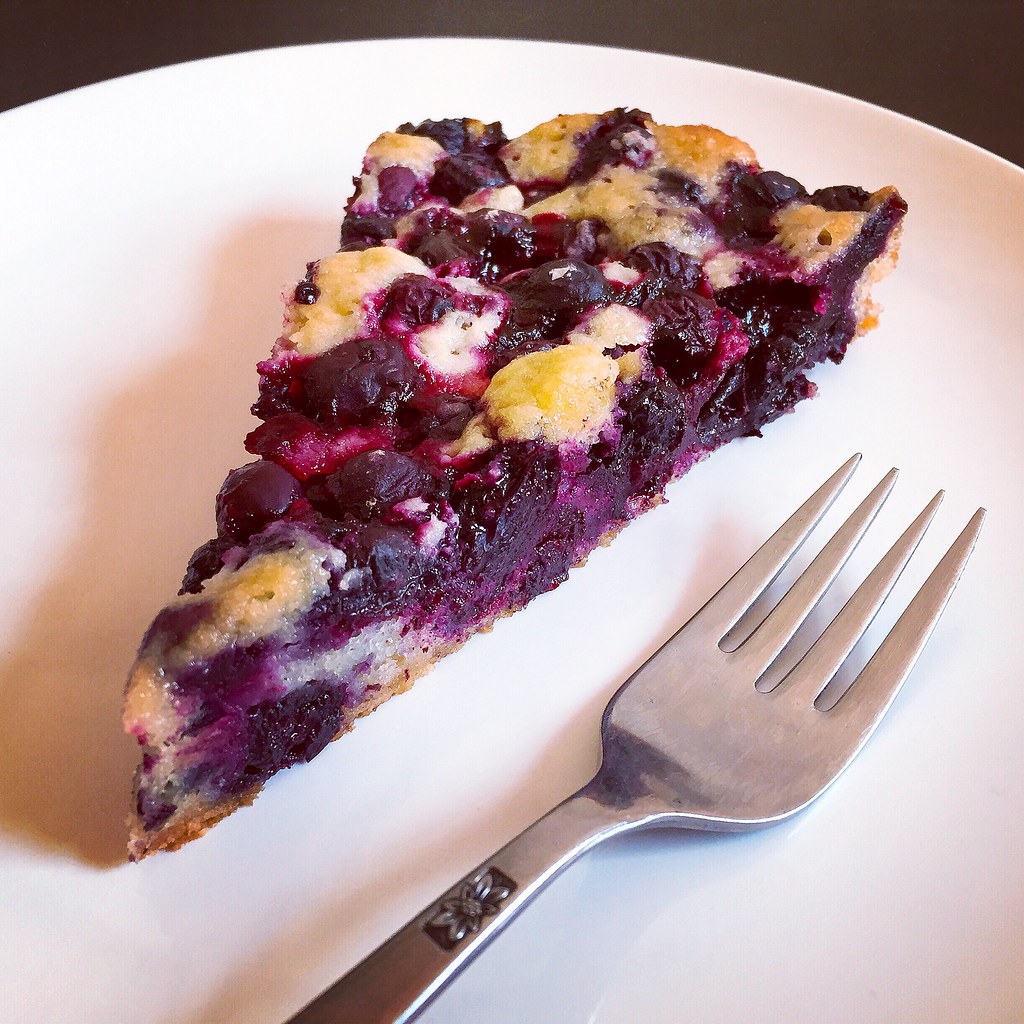
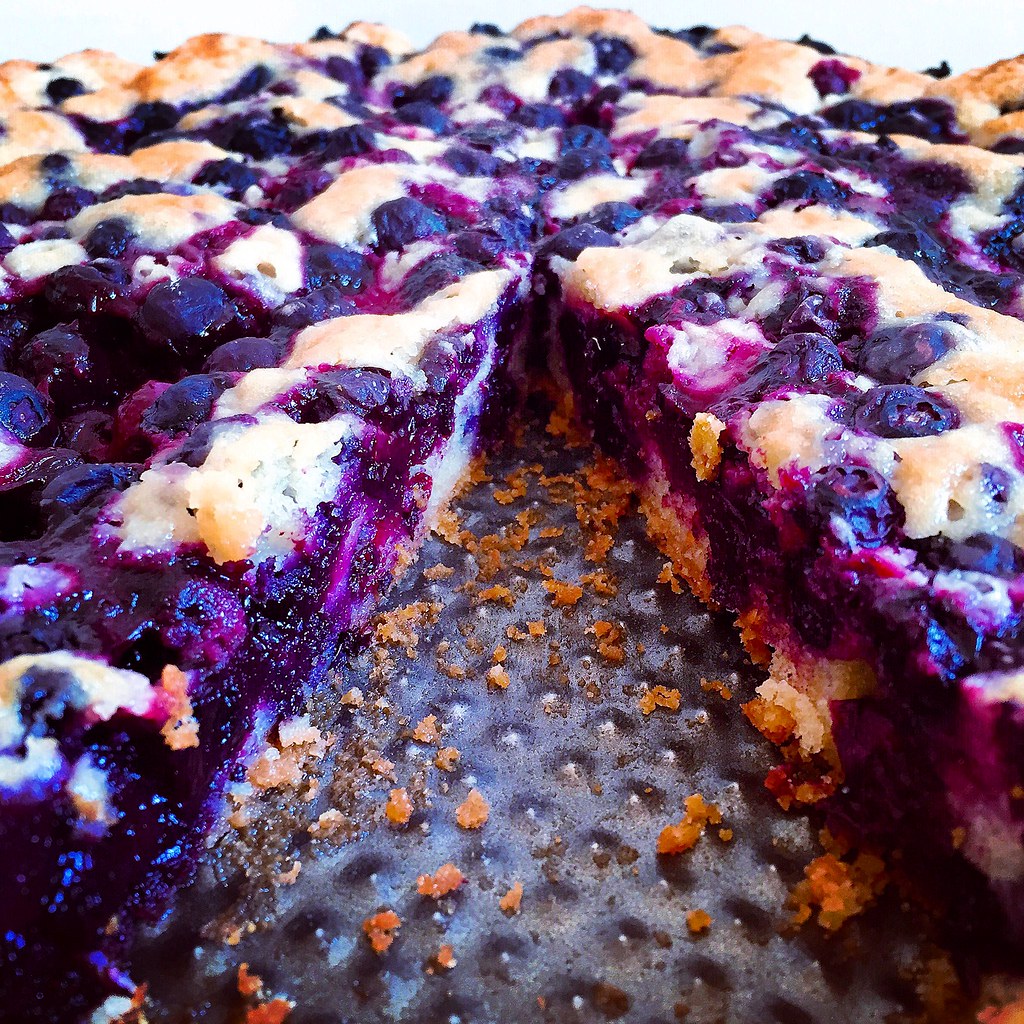
I first had this cake at my friend Evie's Epiphany Party last year, and it was truly an epiphany. I never knew homemade cake could taste so good--so buttery and moist and bursting with blueberries! I e-mailed Evie immediately after the party to ask for her friend's recipe, and it turns out it's from a bed & breakfast in Maine.
The first time I made this cake I made it in a pie pan (because I didn't have a 9" pan) and used frozen wild blueberries. It was quite tasty but not as pretty so I dusted it with powdered sugar as instructed in the original recipe. When I made it this time I used a 10" springform pan and fresh blueberries, and it looked nice enough to forgo the powdered sugar dusting.
Don't worry if you think the cake batter to fruit ratio is off. You will be spooning a lot of blueberries on top of the batter, but while the cake bakes in the oven the blueberries sink while the cake rises so it's perfect by the end.
Maine Blueberry Gateau (lightly adapted from the Benjamin F. Packard House via The Washington Post)
serves 6
1 cup and 1 teaspoon all-purpose flour, plus more for dusting the pan
1 teaspoon baking powder
1/2 teaspoon kosher salt
1/2 cup (1 stick) unsalted butter, softened
1 cup sugar
1/4 teaspoon vanilla extract
2 large eggs
1 pint fresh blueberries, rinsed and drained (may substitute frozen wild blueberries)
1 teaspoon fresh lemon juice
Confectioners' sugar, for garnish (optional)
Preheat the oven to 350°F.
Lightly grease a 9- or 10-inch springform pan and dust with flour.
In a small bowl, combine 1 cup of the flour with the baking powder and salt and set aside.
Using an electric mixer on medium-high to high speed, cream the butter, sugar, and vanilla until light and fluffy, about 3 minutes. Add the eggs one at a time and continue beating until well blended. Reduce the speed to low and gradually add the flour mixture. Beat until smooth. Pour the batter into the prepared pan.
In a medium bowl, combine the blueberries with the remaining teaspoon of flour and the lemon juice. Spoon the berry mixture over the batter.
Bake for 50-55 min, or until a cake tester or toothpick inserted in the center comes out clean. Remove from the oven and let the cake cool in the pan for 10 minutes. Slide a thin knife around the edges of the cake to release it from the pan before you release and remove the springform.
Dust the cake with confectioners' sugar before serving, if you want.
Next: How to Make an American Flag Cake
Previously: Tortilla Española (Spanish Potato Omelet)
Last Year: Garlic Naan
Two Years Ago: Speculoos (Cookie Butter) Ice Cream and Mini Stroopwafel Ice Cream Sandwiches
Three Years Ago: Homemade Cronuts
Six Years Ago: Elote (Mexican Grilled Corn)
Seven Years Ago: Bulgogi Dumplings
Friday, May 13, 2016
Chin Chin Truffles
A truffle is a soft sweet, made with a chocolate mixture, and added flavours, often served as dessert; (not to be confused of course, with the expensive fungus delicacy, of the same name which is used in cooking.)
Chin-chin is a popular snack in Nigeria, made by deep frying a sweetened dough mixture. As part of my journey discovering new ways of serving Nigerian food, I have done a few things with chin-chin such as adding to desserts as a base or just to add some texture crunch...
Chin chin could be quite versatile depending on how imaginative you are in the kitchen. (Check out all of my chin chin recipes here.)
So my newest creation, Chin Chin Truffles are so easy to make and are delicious to eat. They come in handy to serve to guests in combination with other sweets like coconut candy.
Check out how to make some below.
What you need
Good quality chin chin extra crunchy. You can buy some in the store or make some (recipe here)
Condensed milk
White milk chocolate
What to do
Place the chin chin into a plastic bag and using a rolling pin, crush into fine small pieces. You can also use a food processor to achieve the same outcome.
Transfer the crushed chin chin into a bowl and add the condensed milk and melted white chocolate. Stir all ingredients together until well combined. The result should be stiff mixture. (Adjust stiffness by adding more or less condensed milk.
Then with slightly moistened hands, take a little quantity at a time and roll into balls....(or use a mould to achieve what ever shape you prefer.
Chill before serving
Wednesday, May 15, 2013
British Recipes: Pancakes ( includes some great filling ideas)
Pancakes
A pancake, also known as a hotcake or flapjack is a thin, flat, round cake prepared from a batter and cooked on a hot griddle or frying pan. In Britain it is made without a raising agent, and is similar to a frensh crepe. In America, a raising agent is used (typically baking powder). The American pancake is similar to a Scottish pancake or drop scone.
The Ancient Greeks made pancakes called τηγανίτης (tēganitēs), the word indicates from τάγηνον (tagēnon), meaning "frying pan". The earliest references on tagenias are in the works of the 5th century BC Greek poets. Tagenites were made with wheat flour, olive oil, honey and curdled milk, and were served for breakfast. The word Pancake appears in English in the 1400s.
I like to call these rather a British recipe as in Britain and the Commonwealth, they are associated with Shrove Tuesday, commonly known as Pancake day, when perishable ingredients had to be used up before the fasting period of Lent began. So to the British it is still a very ongoing traditional recipe as in other countries it is more commonly used as a Breakfast dish, desert or just a snack. Still till this day Pancake day is celebrated trough out The British Isles and the Commonwealth Countries.
Serves: makes 8 pancakes
Ingredients:
220 grams of plain flour, siffed
a pinch of salt
2 large eggs
1 pint of milk
50 grams of butter
Step 1:
Start with sifting your flour and a pinch salt over a large mixing bowl, try holding your sift high over the bowl to get some air into your mixture.
Step 2:
Make a little well into the centre of your flour and break your two eggs so they are sat in the middle of your flour. Whisk the eggs into your flour and make sure that all the flour is mixed in well so it forms a pasty dough.
Step 3:
Gradually pour in the milk in small amounts while mixing it all together, keep adding milk while whisking your dough into a batter.
Whisk with short strokes so you create airbubbles in your batter, it needs to be the consistency of thick cream, now leave it to rest for 30 minutes before cooking it will give you a better pancake.
Step 4:
Melt 50 grams of butter in a frying pan over medium heat, when your butter has melted take two tablespoons of butter out your pan and whisk this into your pancake batter it will make sure your pancake cooks better and trough out.
Step 5:
To your frying pan with the melted butter you now add your pancake mixture, Pour around 2 tablespoons of batter into your frying pan. As soon as it hits your frying pan make sure you divide the batter even over the bottom of the frying pan by either using your spoon or rolling your pan from side to side.
Step 6:
Cook on a low heat, you will see your pancake batter turn to a solid state. Lift your pancake with a spatula or knife and turn over to cook the other side, your cooked side should now be golden brown.
Cook the other side for a shorter while because it is already cooked and just needs to be browned of.
Step 7:
When cooked you just slide it out of your pan onto a plate and add any topping you desire, I will mention some awesome pancake TIPS below.
You could also make a big pancake tower by making more batter and stacking the cooked pancakes up on top of each other topped with some melted butter and syrup ( Maple syrup tastes amazing)
Tips :
Sweet fillings:
- Melted chocolate, banana and cream
- Spiced Oranges and Ice cream
- Ice cream, crushed walnuts, cream and Honey
- Fresh lemon juice and Sugar
- Peanut butter and Chocolade
- Mascapone, whipped cream and summer fruits
- Strawberry or Peaches and whipped cream
- Maple syrup and pear
- Banana and toffee sauce
savoury fillings:
- fried mushrooms and onions
- Grilled Bacon, mushrooms and onions
- Chilli con carne
- Bolognaise sauce with meatballs or grilled vegetables
- Ham and cheese
- Cheese and onion
- Mushroom and squash
- Bacon and Maple syrup
- Smoked salmon with lemon or egg salad
As you can see a Pancake is just a base to so many delicious creations, These are just a view of the creations i have tryed myself but if you have one that stands out then please be so kind to comment on this post and i will add them to the lists of toppings.
Now in Britain they would say " Enjoy your meal".
Where can we find Britain in the world?
Subscribe to:
Posts (Atom)
Happy Birthday Pam!
It was Pam birthday and her lovely husband set the cooking party with good friends for her as she love cooking and Thai food. They are real...