Showing posts with label bread. Show all posts

Wednesday, February 8, 2017

Banana Bread


So my kiddos always go from loving bananas and eating them faster than I can keep them in the house to not touching them at all and then I'm left with a bunch of brown bananas. And what do you do with a bunch of brown bananas? Make a simple banana bread of course!

2 cups flour
1 tsp baking soda
1/4 tsp salt
1 egg
1 cup sugar
1/2 cup canola oil
2 tbsp milk
1/2 tsp vanilla extract
3 ripe bananas (mashed)

Heat oven to 325. Grease a loaf pan.  Combine the flour, baking soda and salt in a mixing bowl. In a separate bowl combine the egg, sugar and oil.  Stir the dry ingredients into the wet then add the milk, vanilla extract and mashed banana. Pour into the loaf pan and bake for 50 to 65 minutes or until the bread is cooked through.  Let cool in the pan for 10 minutes then remove to a wire rack to continue cooling.

Wednesday, January 4, 2017

Sour Cream Biscuits


These biscuits were so tender and light.  They were a great addition to breakfast night and would be a good side along any meal! This recipe is adapted from Baking Bites.

2 cups flour
1 1/2 tsp baking powder
1 tsp sugar
1/2 tsp salt
6 tbsp salted butter (chilled and cut into very small pieces)
1 cup sour cream

Heat oven to 400. Line a baking sheet with parchment paper. Whisk together the flour, baking powder, sugar and salt. Using a pastry blender or two forks add in the butter until the mixture resembles coarse sand. Stir in the sour cream until the dough comes together. Knead the dough on a floured surface for 3-4 minutes. Roll out into a 1 inch thick slab.  Using a biscuit cutter, cut out the biscuits and place on the parchment paper. Bake for 17-20 minutes or until the biscuit tops are lightly browned.

Chocolate Babka


Last year I had the smart idea to try making a matcha babka wreath with milk bread dough.  In my head it would be pretty, and green-tinged, and perfect for the holidays.  In reality, it was dense, ugly, and I ended up throwing it out.

This year I decided to follow this tried-and-true recipe for chocolate babka from Smitten Kitchen.  The only change I made to the ingredients is that I used the zest from a whole orange instead of half an orange, and the smells that came out of my oven were glorious.  I also tried shaping it using what I remembered from the pictures in the Baking Breads cookbook.


Since the recipe makes two loaves, I decided to give one of the loaves the "pull-apart swirly bread" treatment.  If you'd like to try it, roll out a quarter of the dough (half a loaf) into a rectangle about 10" wide and as long as you can get it.  Spread with 1/4 of the filling and roll it up along the long edge.  Seal the seam and place in the freezer for 15 minutes while you repeat the same with the other quarter of dough.  Slice each log into 8 pieces, and arrange all 16 pieces in a well-greased 9" springform or square pan.  Let rise for an hour and then bake for 25-30 minutes at 375°F until nicely browned.  Brush with syrup and serve.


Chocolate Babka (based on Smitten Kitchen)
makes 2 loaves

For the dough:
1 packet (2 1/4 teaspoons) active dry yeast
1/2 cup warm water (about 100 F)
4 1/4 cups all-purpose flour
1/2 cup sugar
1 teaspoon kosher salt
Zest from 1 orange
3 large eggs
11 tablespoons unsalted butter, softened

For the filling:
3/4 cup semi-sweet chocolate chips
1/2 cup unsalted butter
1/2 cup powdered sugar
1/3 cup cocoa powder
1/4 teaspoon cinnamon

For the syrup:
1/3 cup water
6 tablespoons sugar

Sprinkle the yeast over the warm water in the bowl of a stand mixer and let sit while you measure out the rest of the ingredients.  Add all the ingredients for the dough except the butter and mix with a dough hook until it comes together.  Add the butter, one tablespoon at a time, until it is all incorporated.  Knead on medium until the dough is completely smooth and comes away from the bowl.  Cover and refrigerate overnight.

The next morning, make the filling by melting the chocolate chips and butter together, stirring until smooth.  Add the powdered sugar, cocoa powder, and cinnamon and stir until it forms a spreadable paste.  Grease 2 loaf pans and line with parchment paper.

Remove half the dough from the refrigerator and roll out on a floured surface until 10" wide on the bottom and as long as you can get it.  Spread the filling on top, leaving an inch border on all sides except the bottom.  Roll up the dough in a tight spiral starting from the bottom.  Wet the top edge and seal together.  Wrap with aluminum foil and place in the freezer while you work on the second half of the dough.


Remove the first log from the freezer and use a sharp knife to slice in half, lengthwise, revealing all the layers of dough and chocolate filling.  Make an "X" with the two halves, placing the prettier half on top.  Twist the top half and bottom half and place in one of the greased pans, tucking the ends underneath.  Repeat with the second half.  Cover both and let rise another hour.  Preheat oven to 375°F.


Bake loaves for 25-30 minutes, until a skewer meets no resistance when inserted and comes out without any dough (it will most likely come out with some chocolate filling which is very tempting to lick).

While the babka is baking, make the syrup by combining the water and sugar in a small pot and heating until the sugar is all dissolved.  Brush the loaves with the syrup as soon as they come out of the oven.


And if you manage to have any leftover babka, you can turn it into the most amazing bread pudding using this recipe from Serious Eats!  (I just added some coconut milk on top for contrast.)


Next:  Marion Cunningham's Yeast-Raised Waffles
Previously:  Pull-Apart Scallion Swirly Bread
Two Years Ago:  Zuppa Toscana
Three Years Ago:  Flower Pavlovas
Four Years Ago:  Tartine Lemon Cream Tart
Seven Years Ago:  Gaufres de Liege (Belgian Waffles)
Eight Years Ago:  Hua Juan

Monday, December 19, 2016

Pull-Apart Scallion Swirly Bread


This is another post that started with a picture on Instagram.  I saw Sarah Jampel's picture of kubaneh from the Breaking Breads cookbook and was utterly transfixed.  Then it showed up again on the Food52 feed in a picture for their store's twine holder, but all anyone wanted to know was what the beautiful, crazy, swirly bread was on the right.  I managed to track down the recipe from my library's copy of Breaking Breads and tried it without even knowing what it was supposed to taste like.


The original was a bit too salty for my liking, but the picture above garnered the most likes I've ever gotten for an Instagram post!  I decided to take a cue from Molly Yeh's scallion pancake challah bread and try a hua juan version of kubaneh by brushing a mixture of scallions and sesame oil on the dough before rolling it up.  I also used a fresher yeast this time, and the results are pretty spectacular if I do say so myself.


The bread itself reminds me a lot of milk bread in that it's slightly sweet and very soft, yet the parts that get browned turn out a little crunchy from all the butter!  And even though you just apply a small smear of the sesame-scallion filling, it's so fragrant that the flavor gets infused throughout the whole roll.  It's definitely better when warm, so if you're eating it a day or two later, microwave it for 10-20 seconds to rewarm it.


Pull-Apart Scallion Swirly Bread (adapted from Breaking Breads)
makes 16 rolls

For the bread dough:
1 1/4 cups water
1 packet (about 2 1/4 teaspoons) active dry yeast
4 cups all purpose flour
1/4 cup sugar
1 tablespoon kosher salt
1 stick butter, very soft

For the filling:
1 tablespoon toasted sesame oil
1/4 cup finely chopped scallions
1/2 teaspoon kosher salt
1/4 teaspoon sugar

Sprinkle the yeast over the water in a stand mixer bowl and allow to dissolve.  Mix the flour, sugar, and salt in a separate bowl, then add to the yeast and water.

Use the dough hook on low to combine the ingredients, then mix on medium-high until the dough comes away from the bowl cleanly.  Give the dough a few folds to form a nice, tight ball.  Cover the bowl and let rise until almost doubled, about 30 minutes.

Lightly butter a large plate (I usually use the butter wrapper to do this).  Divide the dough into 8 pieces, shape each into a tight ball, and place on the plate.  Cover and let rise for another 30 minutes.

Mix the sesame oil, scallions, salt, and sugar in a small bowl.  Generously grease a 9" springform pan with the softened butter.

Use about a tablespoon of the butter to generously grease a clean 11" x 17" rimmed baking sheet.  Place one of the balls of dough on the baking sheet, smear a little more butter on top, and start pressing it out to cover almost the entire sheet.  Sprinkle some of the scallion filling across the middle lengthwise third of the dough.  Fold the top third of the dough down and then the bottom third up (like a business letter fold, but lengthwise).  Roll the dough up into a tight spiral and cut in half.  Place the cut sides up in the buttered pan.  Repeat with the remaining balls of dough.  Cover the bottom of the pan with a large piece of aluminum foil or place in another pan to catch any melted butter that leaks out.  Cover the pan and let the dough rise a final time for 45 minutes.

Preheat the oven to 350°F.  Bake the bread for 15 minutes, then turn the heat down to 325°F.  Bake for another 30-40 minutes, or until the tops are golden brown.  If there is any butter left, melt it and add it to any remaining filling mixture and brush on top of the rolls.  Serve warm.


Next:  Chocolate Babka
Previously:  Cranberry Curd Tart
Two Years Ago:  Puppy Chow Pie
Three Years Ago:  Miso Pumpkin Soup
Four Years Ago:  Homemade Ramen Noodles
Seven Years Ago:  Tim Tam Slam Ice Cream
Eight Years Ago:  Pork and Cabbage Dumplings

Tuesday, November 22, 2016

Cranberry Nut Bread

Loafing around.....with a loaf of
Cranberry Nut Bread and a cup of coffee.
It's that time of year when it's always nice 
to have a sweet homemade treat in the house. 
  Cranberries are plentiful in the grocery store
 right now and that got me in the mood
 for this classic quick bread.
In a large bowl whisk to combine the dry 
ingredients. Toss the cranberries and nuts 
into the flour mixture. You can also add 
them at the end as I did this time. Next, 
melt the butter in a glass cup then add it 
to the orange juice. Then use that cup to 
whisk the egg lightly with a fork and add 
that to the orange juice and butter mixture. 
 Whisk that all together and add to the 
bowl with the dry ingredients.
 Stir just to combine.
 Add the nuts and cranberries if you didn't 
already toss them in with the flour mixture.
I don't cut the cranberries in half as in so
many recipes. Too much trouble and they 
bleed into the batter. It also saves me a step!  
 Put into a greased 9x5 loaf pan. 
I love using this vintage pyrex one. 
 Bake for an hour. 
Check for doneness with a wooden skewer.
 Wait 10-15 minutes before inverting out.
 I freeze this bread in sandwich baggies 
placed flat with 2 slices (side by side) for us. 
 I love a warm piece slathered with soft butter.
Also good is a spread of equal parts butter and
 cream cheese whipped together. 

Cranberry Nut Bread
2 C flour
! C sugar
1-½ t baking powder
½ t baking soda
½ t salt
Whisk the dry ingredients in a large bowl
the add:
1 heaping C cranberries
½  heaping C chopped pecans
Toss to coat with flour mixture.
In a 2 C measuring cup combine:
¾ C orange juice
¼ C melted butter
1 egg, beat with a fork
Mix together then add to the dry 
ingredients in the bowl. Stir until
blended. Pour into a greased 9x5
loaf pan and bake at 350ยบ for 1 hour.
Test for doneness. Toothpick inserted 
in the center comes out clean. Cool for 
10 minutes. Remove from the pan. 

Enjoy! 


Monday, April 18, 2016

Will It Puffle?


I was so excited when I received an electric bubble waffle maker from my brother and sister-in-law for my birthday last year.  I had visions of making the eggettes I used to get from NYC's Chinatown and SF's Genki and maybe even making a puffle cone a la Cauldron Ice Cream or Monkey King Tea (below).  But after trying the recipes I found on-line for eggettes and puffle cones (basically the same recipe) I'm still not satisfied with the results.  I even played around a little with the ingredients but nothing I made recreated the aroma, texture, or taste I was looking for.


Not to be deterred, I decided to experiment with some other batter-based foods I had made before.  First up was pรฃo de queijo (Brazilian cheese bread).  Since some of the eggette recipes used a little tapioca flour, I figured it would be fun to try an entirely tapioca flour based batter in the bubble waffle maker.  The results were incredible!

https://www.flickr.com/photos/joyosity/24500005166/in/dateposted-public/

The bubble waffle maker was able to encapsulate the chewy, airy bread in a crispy crust in a fraction of the time it takes to bake the pรฃo in the oven.  And it's sooooo cute!

https://www.flickr.com/photos/joyosity/26219396352/in/dateposted-public/

I also tried Korean pajeon (above) and Japanese okonomiyaki (below), and the results were decent, but not really worth writing about.

https://www.flickr.com/photos/joyosity/26307581532/in/dateposted-public/

Probably my favorite use of the bubble waffle maker has to be the Taiwanese oyster omelette.  Since I remember the sweet potato starch batter to be super sticky, I added a half tablespoon of oil to the batter itself and made sure to oil the waffle iron well before adding the batter.  And even though I took those precautions, I was still surprised when the omelette came out rather easily from the iron.  

https://www.flickr.com/photos/joyosity/26169045712/in/dateposted-public/

As with the pรฃo de queijo, I loved how the outside of the batter got super crispy but still stayed moist inside.  And the shape of the bubble waffle maker gave it a lot more nooks and crannies for an even higher crispy to chewy ratio!


So does anyone else have a good eggette recipe or recommendation for what to try next in the bubble waffle maker?

Next:  Sesame Soba Noodles with Avocado Rose
Previously:   The 4-Hour Baguette
Last Year:  Gordan Ramsay's Sublime Scrambled Eggs - 2 Ways
Two Years Ago:  Nutella Mini Crepe Cakes
Six Years Ago:  The Best Scones in the World
Seven Years Ago:  Samoa Cupcakes and the Cupcake Exchange

Tuesday, March 22, 2016

The 4-Hour Baguette


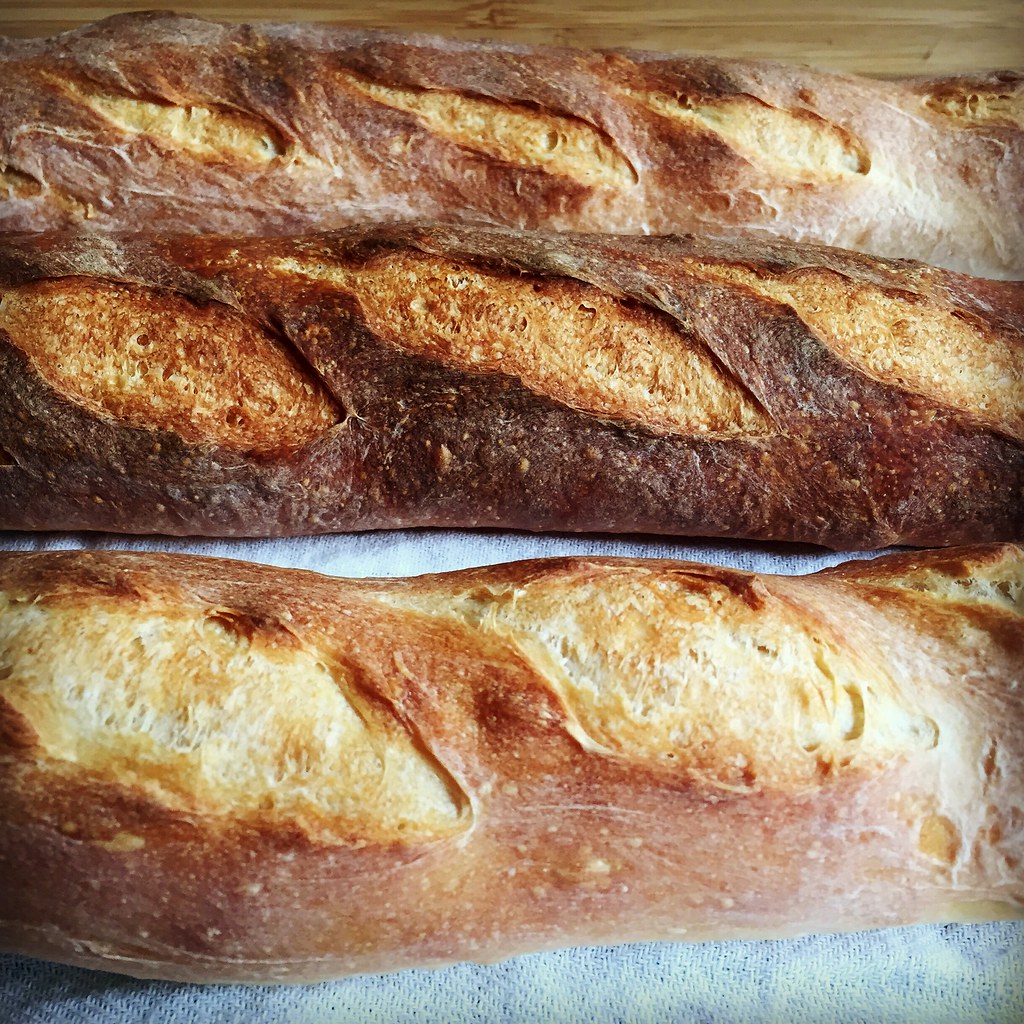
I've made the famous 
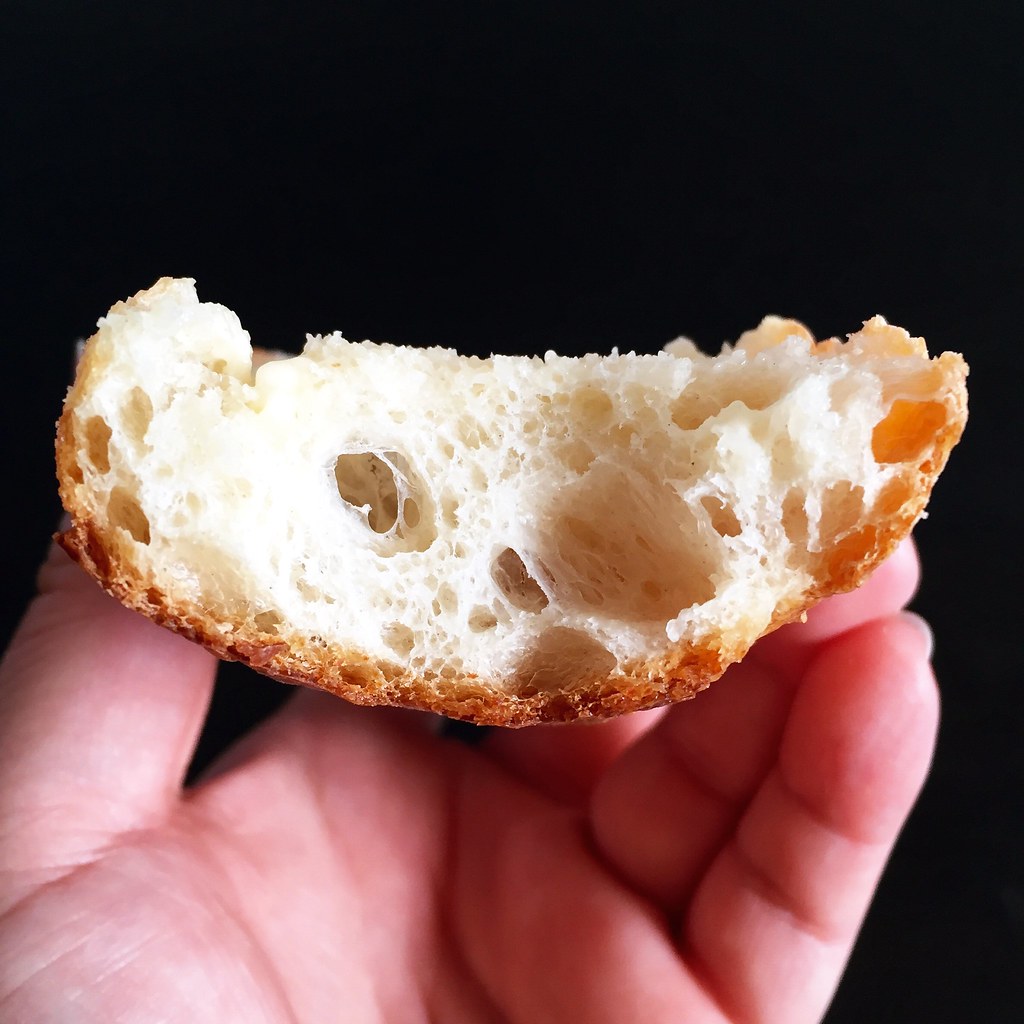
no-knead bread a few times now, and while the concept is great, the reality is I'm always a little disappointed with the results.  Even though there's no kneading involved, it's still a multi-step recipe that can take 20+ hours to finish, and while the texture of the ensuing bread is great for a home cook, it's kind of lacking in flavor.  So I'm pretty excited to have found a recipe for bread that only takes 4 hours from start to finish, still has great texture, and is packed full of flavor.


I pretty much followed this Genius Recipe from Food52 for Dan Leader's 4-Hour Baguette but I applied some of the concepts I learned from Ken Forkish's Flour Water Salt Yeast and added some 
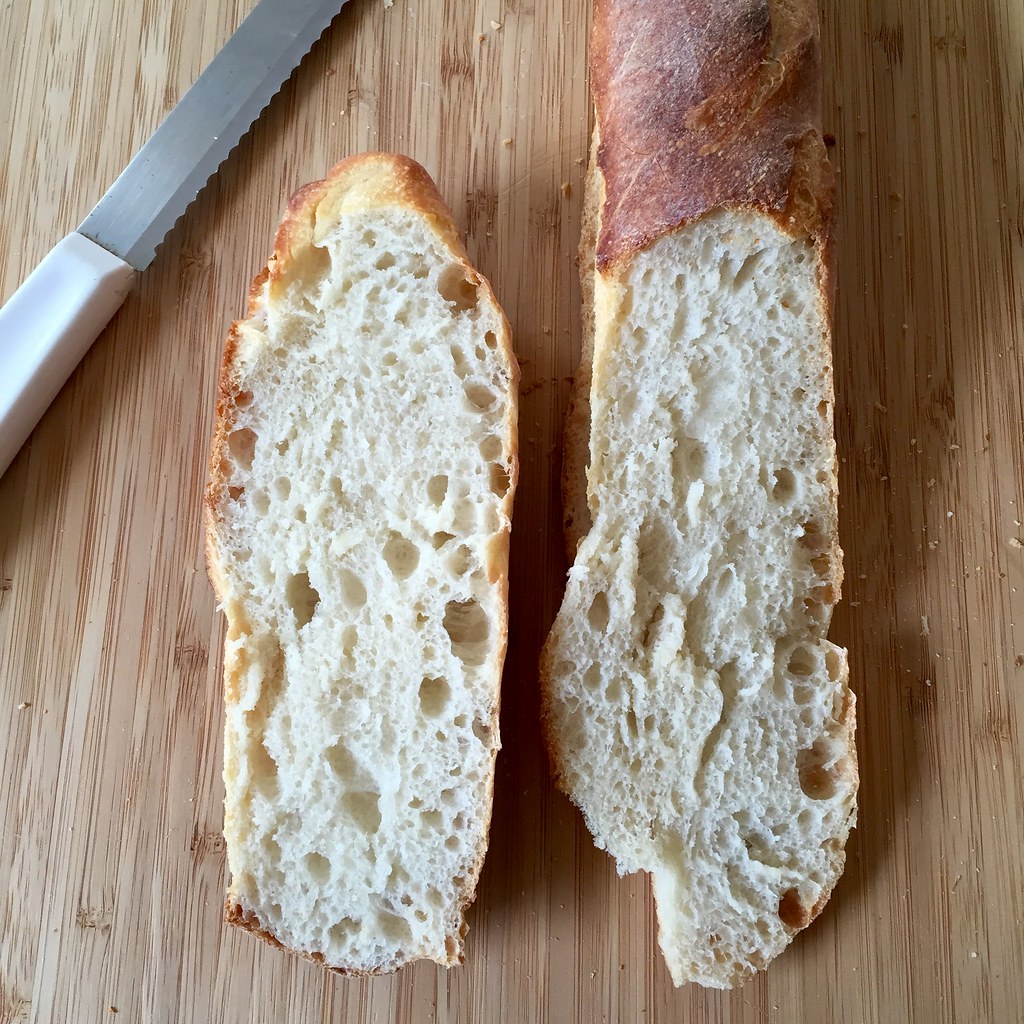
diastatic malt powder.  According to the King Arthur Flour website, the malt powder promotes "a strong rise, great texture, and lovely brown crust".  You can certainly make this bread without it; I just used because I still had some left from making croissants that one time.


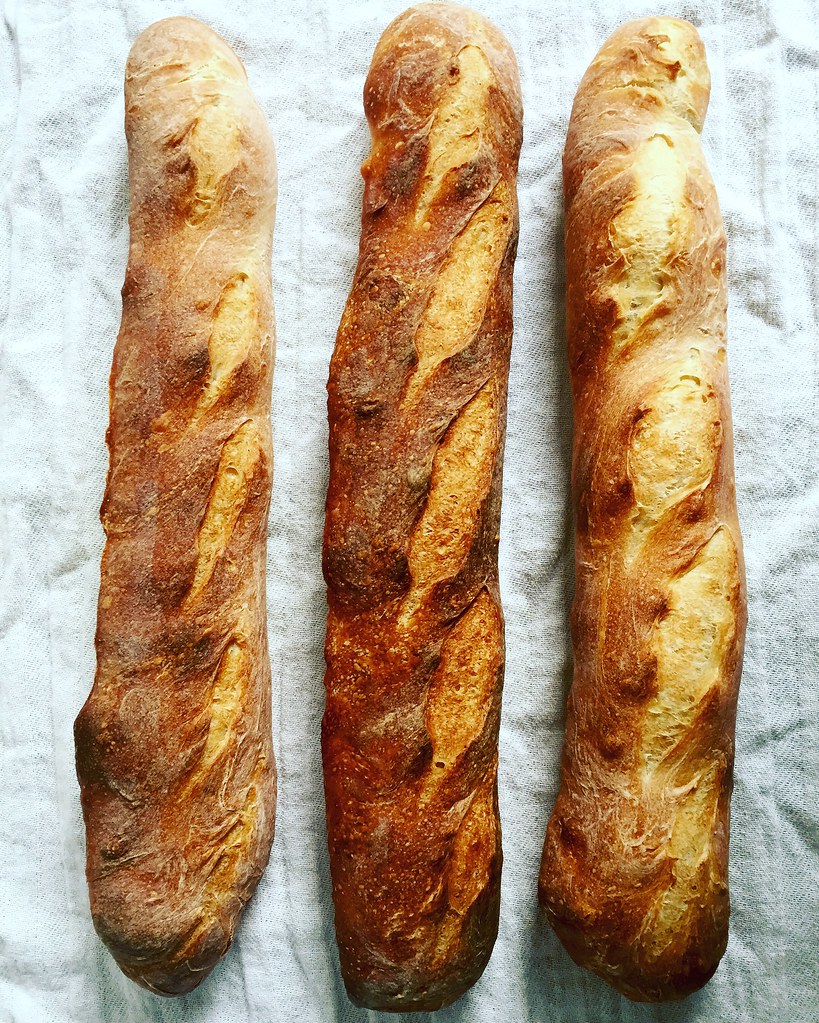
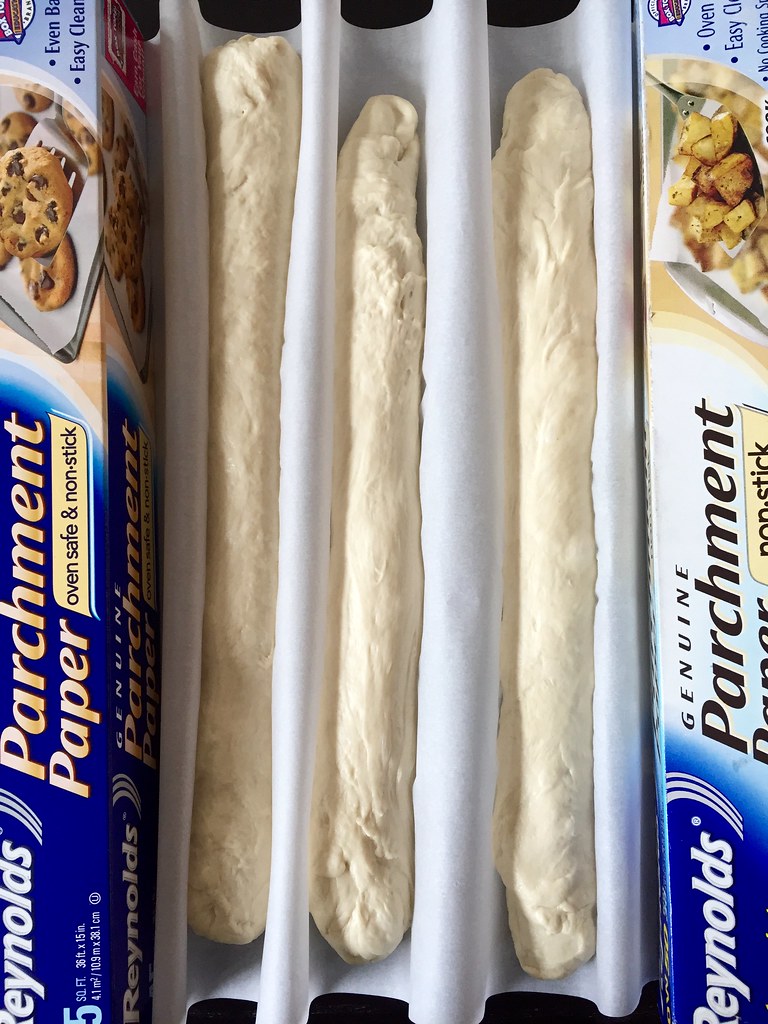
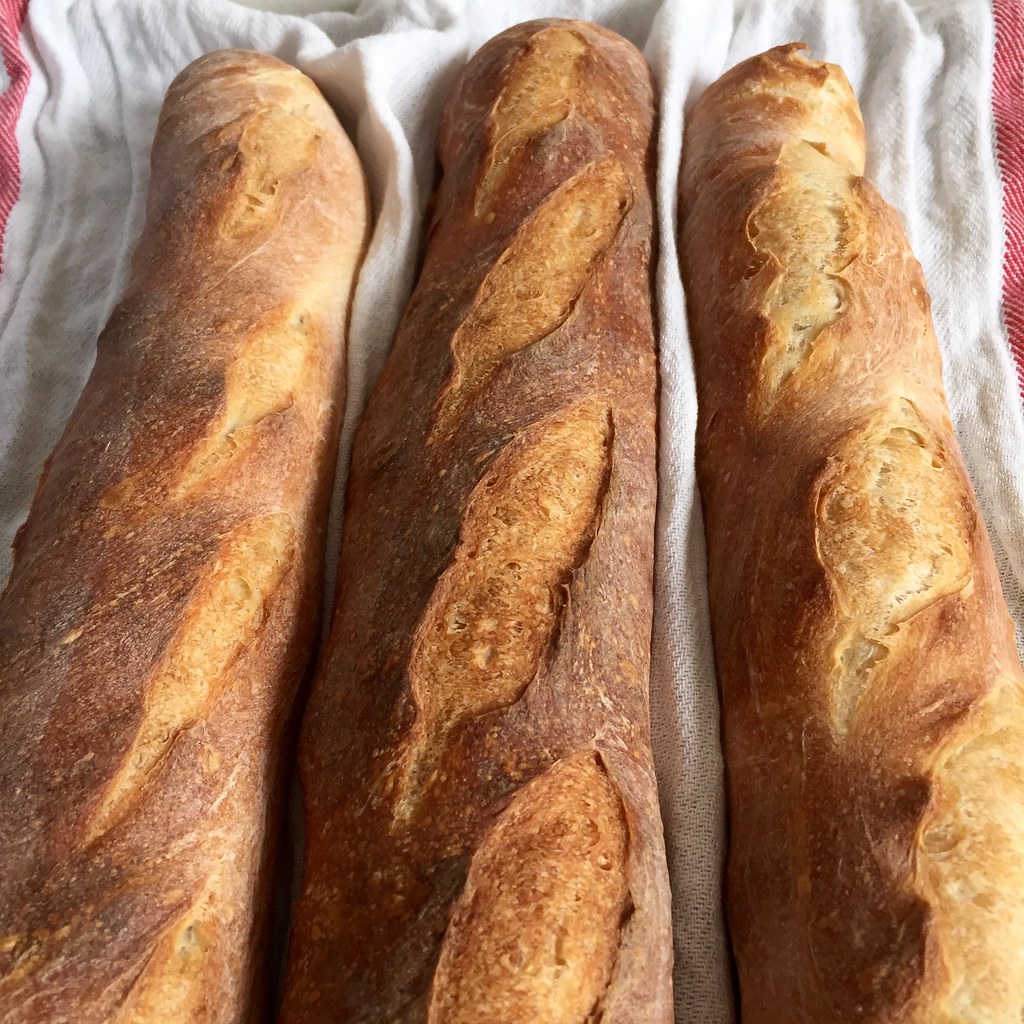
What I love about this recipe is that it doesn't call for any special equipment.  Don't have a stand mixer?  You can knead the dough by hand.  Don't have a pizza stone?  Use a rimless baking sheet or an upside-down baking sheet to bake the loaves on.  Don't have a baguette pan or a baker's couche?  Just use parchment paper and something long and weighted on the sides to help shape the loaves as they rise.  Don't have a bread lame?  Just use a sharp knife or even scissors!  As you can see, while I could definitely use more practice with shaping and scoring baguettes, I'm quite pleased with the results considering it was my first time!


The 4-Hour Baguette (adapted from Dan Leader's recipe on Food52)
makes 3 loaves

1 1/2 cups warm water, about 115°F
1 teaspoon active dry yeast
2 cups all-purpose flour
1 1/4 cups bread flour (if you don't have any bread flour, just use all-purpose flour)
1 teaspoon diastatic malt powder (optional)
3 teaspoons kosher salt
Oil, for greasing bowl
1/2 cup ice cubes or 1 cup water

Place the warm water in the bowl of a stand mixer and sprinkle the yeast over it.  Let stand for 10 minutes, until foamy.

Add the flour(s) and malt powder (if using) and stir by hand with the dough hook until all the flour has been absorbed.  Let sit for 20 minutes to allow the flour to hydrate.

Sprinkle the salt over the dough and knead using the dough hook attachment on medium speed, until smooth and elastic, about 8-10 minutes.  When done, wet your hands and reach underneath the dough and grab about a quarter of it.  Gently stretch this section of the dough up and fold it over the top to the other side of the dough.  Rotate the bowl 90° and repeat 3 more times.  This process is called applying a fold.  Transfer the dough seam side down to a lightly greased bowl, cover with plastic wrap, and place in a cold oven until doubled in size, about 45 minutes.

After it has doubled, apply another fold, cover, and return to the oven again.  Let sit until doubled in size, about 1 hour.

Remove the dough from the oven and place an oven-safe pan on the bottom rack.  Place a pizza stone or a rimless or upside-down baking sheet on the rack above.  Preheat oven to 475°F.


Lightly flour a large piece of parchment paper and place on another rimless baking sheet or cutting board.  Transfer the dough onto a lightly floured work surface and cut the dough into 3 even pieces.  Shape each piece into a rectangle and fold the longer sides in to make a narrower rectangle, sealing the seams with the heel of your hand.  Gently roll the rectangle into a 14" log.  Place the logs, seam side down, onto the parchment paper about 2-3" apart from each other.  Lift up the paper between the logs to form pleats and hold them in place with foil/plastic wrap/parchment paper boxes on either end.  This helps shape the baguettes as they rise so that they expand up instead of out.  Cover loosely with plastic wrap and let sit until it doubles in size, about 50 minutes.


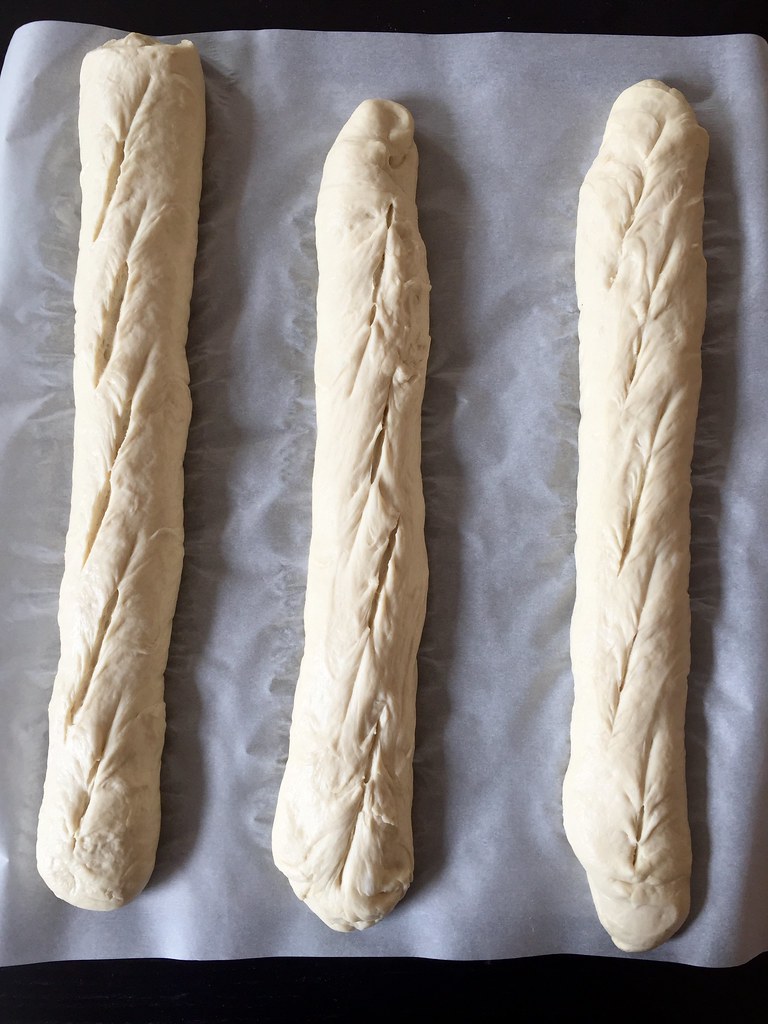
When fully proofed, remove the plastic wrap and flatten out the parchment paper to space out the loaves.  Using a super-sharp knife, scissors, or bread lame, score the top of the dough in long, diagonal slashes.  Trim the parchment paper, if needed, so that it is about the same size as the pizza stone/baking sheet in the oven.

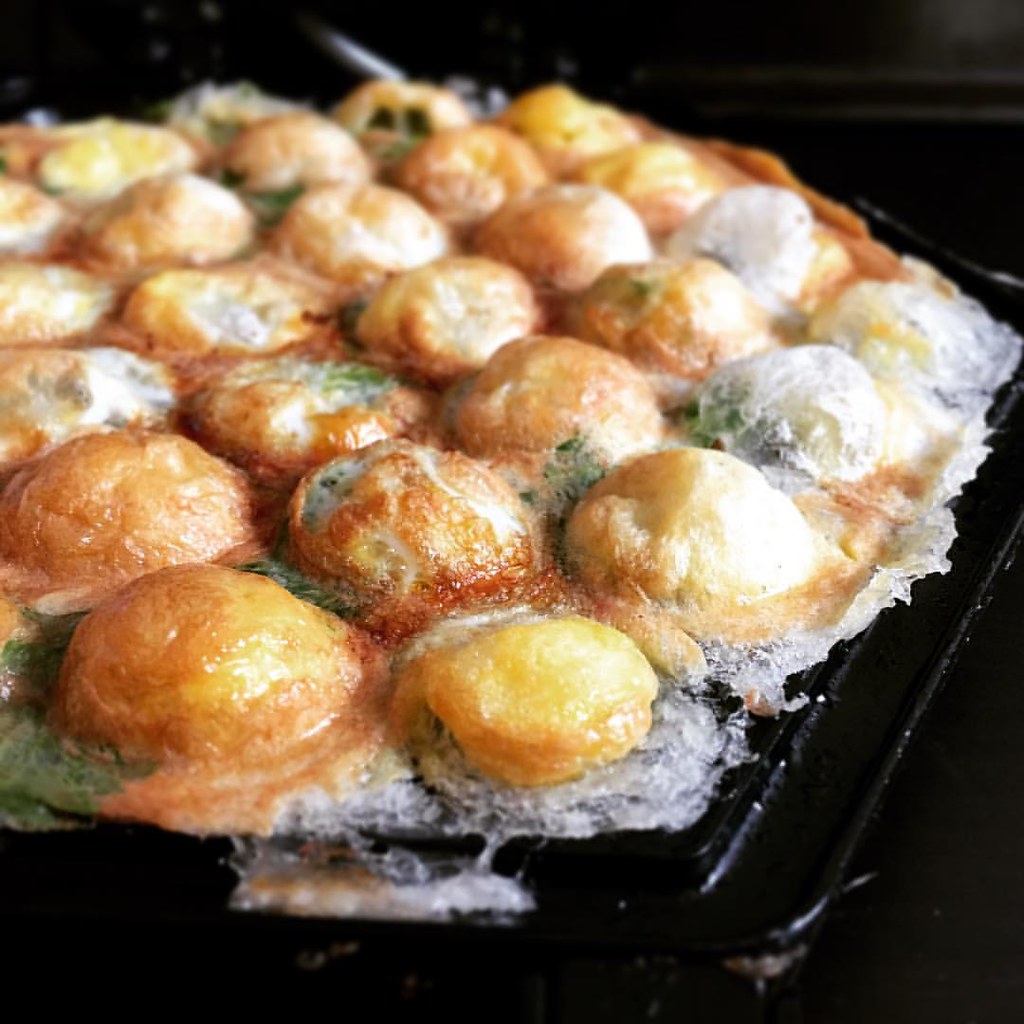
Pull out the oven rack with the stone or baking sheet on it and, using the corner of the parchment paper as a guide, slide the loaves, still on the parchment paper, onto the baking stone or pan.  Place the ice cubes or water in the oven-proof pan (this produces steam that lets the loaves rise fully before a crust forms).  Bake the baguettes until darkly browned and crisp, 20 to 30 minutes; cool before serving.
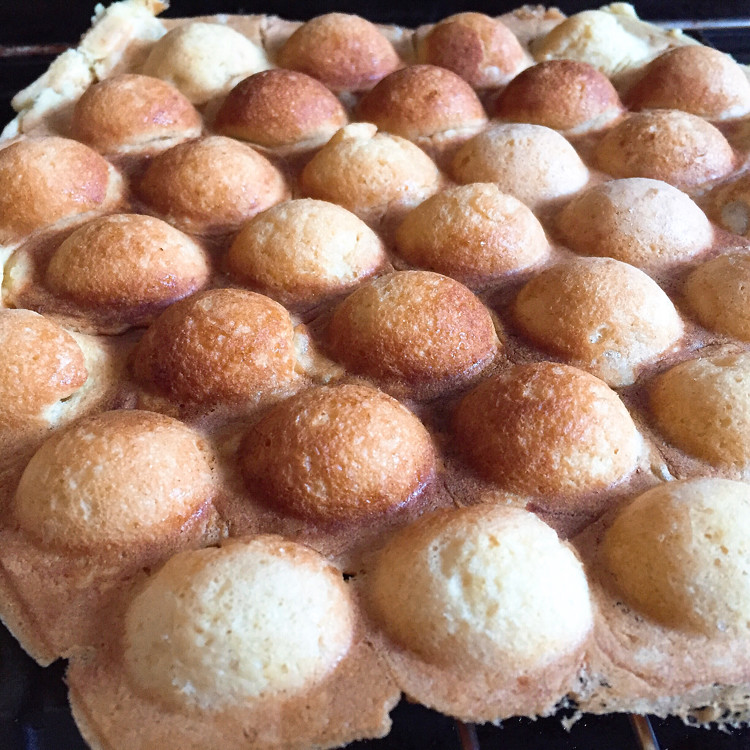
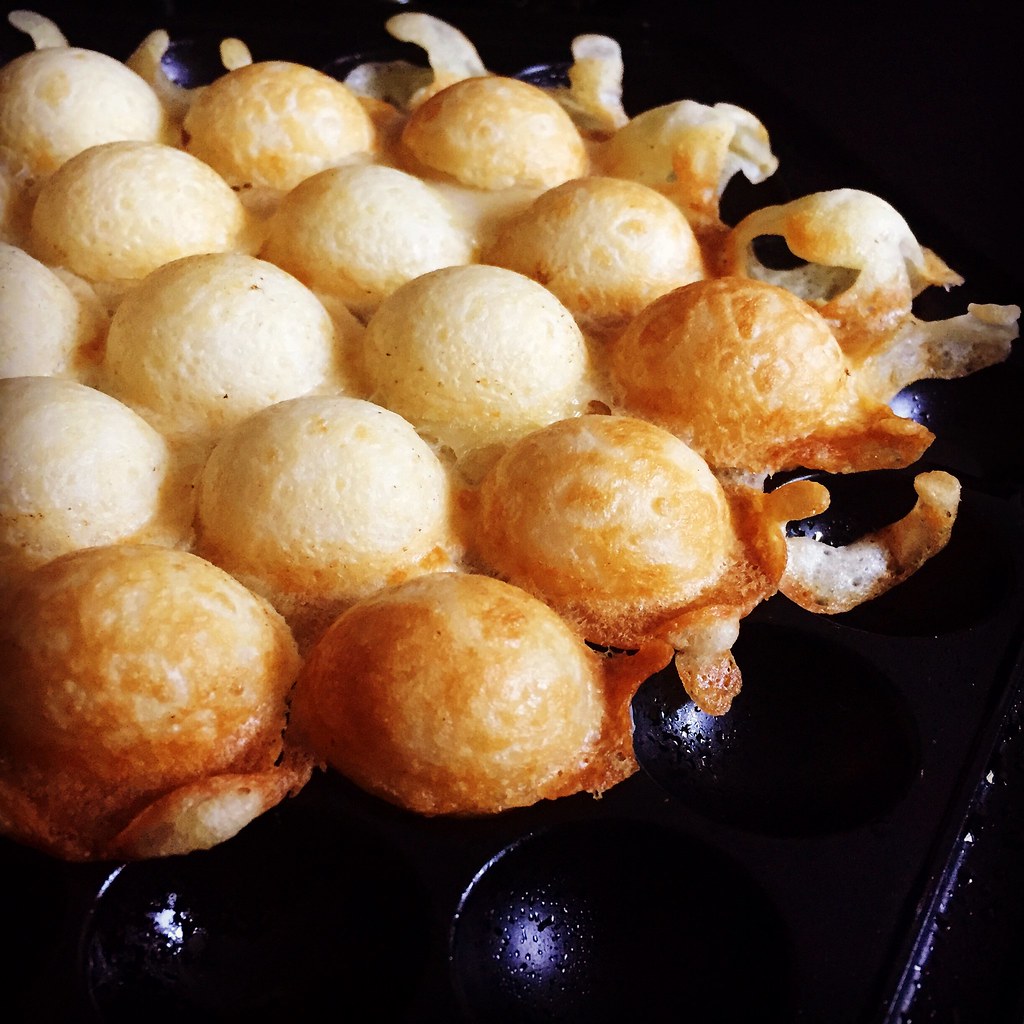
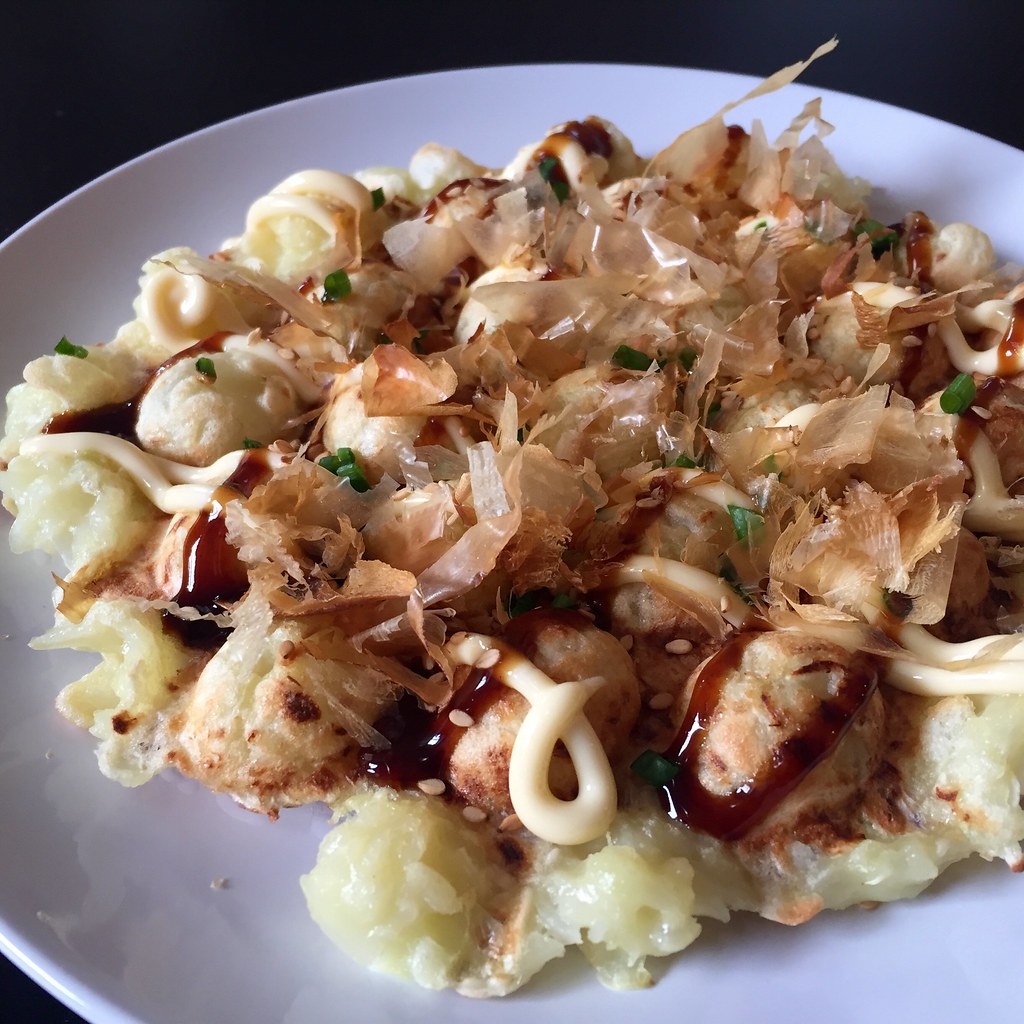
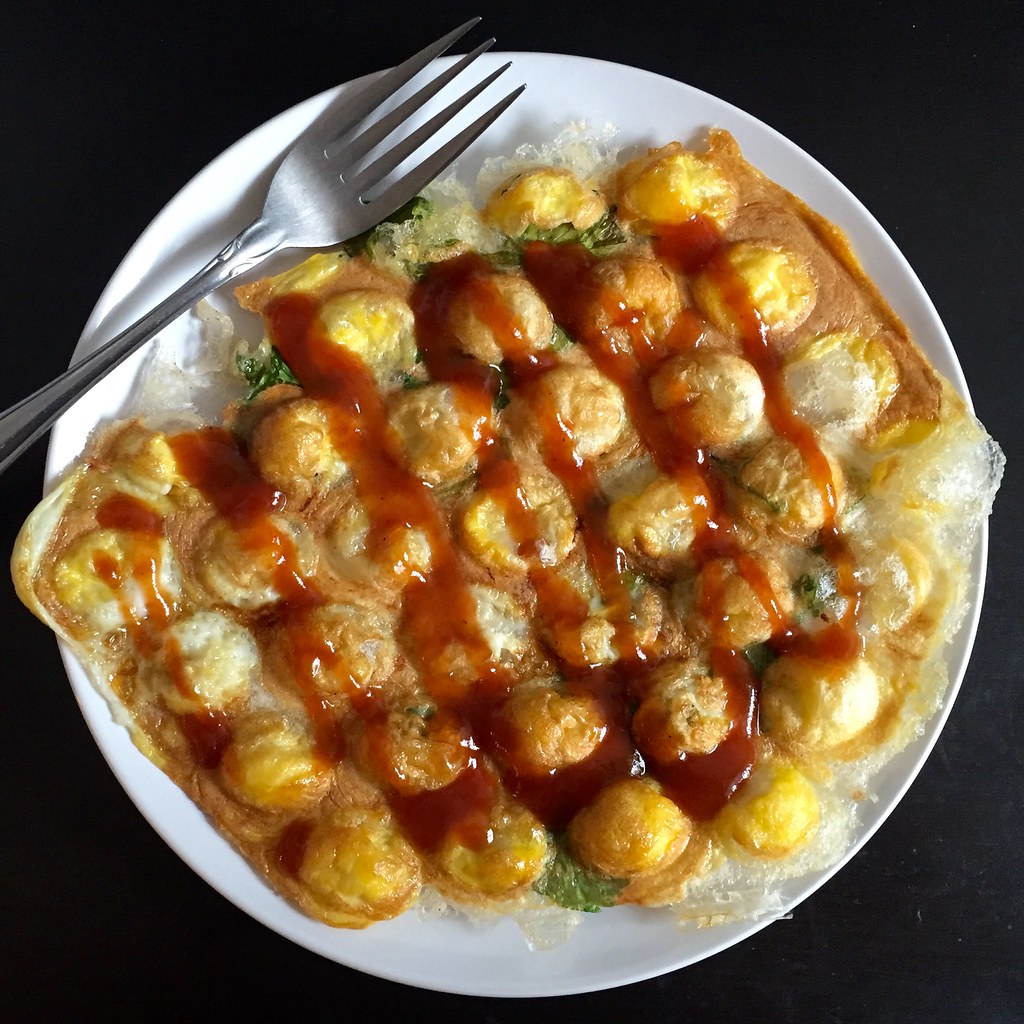

Next:  Will It Puffle?
Previously:  Tropical Pulled Pork on Griddled Banana Bread Sandwiches
Last Year:  Chocolate Mochi Snack Cake
Two Years Ago:  Dan Bing (Taiwanese Egg Crepe)
Three Years Ago:  Happiness Cake
Six Years Ago:  Mama Huang's Secret Beer Duck Recipe
Seven Years Ago:  Cincinnati Chili 

Thursday, November 5, 2015

Sourdough Bread, Perfected, I think

Kneeding bread is a good exercise. No kneed bread is fine but a little kneeding makes better bread.

IMPORTANT INFO: Using antibacterial spray on your work surfaces prior to kneeding bread will kill the yeast. It makes no difference if it's bakers yeast or sourdough.

Those of you who have been following this blog over the years will know that I have been dabbling with sourdough for quite some time. I've had lots of failures as using sourdough is not as straightforward as using yeast. Now we need a drum roll as I believe that I have it sussed.  The result is a light soft bread with a crunchy crust that is all too good to eat. I just wish that I could share it with you all.

I actually cooked this bread in a cast iron pan as this helps to steam the outside of the loaf and create this crust.


Now, it takes time to make sourdough bread but it doesn't take much effort. A little weighing and mixing and leaving is all you have to know. It's the way that you do theses things that gets the results. You can even go wild and kneed it for a bit. I promise that it will make better bread if you do.

You will need a sourdough starter.

200g (100% hydration starter) This should be active and bubbly.
250g white bread flour
250g wholemeal flour
2 or 3 level teaspoons of salt. This depends on how salty you like your bread.
260g water. I always weigh mine as it is the most accurate way of doing it.

Put everything into a large mixing bowl. Mix together vigorously.

Cover with clingfilm or a damp cloth and leave to stand at room temperature for about half an hour.
Now you will need to lift the dough on one side, pull it up as high as it will go and fold it over  the middle remaining dough. Turn the dough a quarter turn and repeat this. Repeat the turning and pulling until all four sides of the dough have been folded over the middle of the dough.

If you can't be bothered to do this, I have found that if you turn the dough out onto a clean work surface and give it a kneed for about ten minutes, it achieves the same thing.

Cover and set aside for about another half an hour and repeat either of the stages that you choose from above.

Now cover and leave at room temperature for about 12 hours. By this time your bread will have tripled in size. It's a good idea to start this dough in the late evening and leave it overningt to bake next day. This way, you won't be tempted to cook it too early.

Shape your bread and leave to at least double in size. This could take anything up to 4 hours so be prepared to wait.

When you think that your bread is about half an hour away from being ready to cook, put your cast iron pan in the oven and heat the oven to 240C.

Remove the pan from the oven pop in the bread. Slash the top return to the oven with the lid on and bake for about 45 minutes. You should remove the lid about 25 minutes into the bake. This will help to crisp the crust.

Enjoy


Tuesday, September 29, 2015

Pizza on a focaccia base

In the last post I gave you the recipe for focaccia, but what I didn't tell you is that this dough makes an excellent base for pizza.


All I did was roll it out thinner than the focaccia and top it with some:

tomato passata,
stoned olives,
thinly sliced chorizo
grated mozarella cheese
a few dried herbs: origano or thyme

Allow it to rise for about 30 minutes and cook in a very hot oven until brown and bubbling.

One of the advantages of pizza over all other doughs is that you don't have to leave it to get cold before digging in.

Wednesday, June 10, 2015

Garlic Naan

https://www.flickr.com/photos/joyosity/17916638533/in/dateposted-public/

What's the point in making tikka masala if you don't have any naan to swipe up the leftover sauce?  If I had known how easy it was to make naan on the stovetop, I would've made it a long time ago!  Since I had some garlic and scallions lying around, I decided to make the garlic version, which let's face it, is so much better than the plain version.

I found the dough to be on the wetter side, so make sure you work it on a floured surface and use a floured rolling pin or else it'll end up sticking everywhere and to everything.  Sadly, naan does not keep well so I would suggest eating it the same day it is made.

https://www.flickr.com/photos/joyosity/18537358545/in/dateposted-public/

Garlic Naan (adapted from Saveur)
makes 4 pieces

6 tablespoons water heated to 115°F
1/2 teaspoon honey
1 heaping teaspoon active dry yeast
1 cup all-purpose flour
1⁄4 cup plain, full-fat Greek yogurt
1 tablespoon canola oil
1⁄4 teaspoon kosher salt, plus more for sprinkling
1 tablespoon minced garlic
1 tablespoon chopped scallions
Melted ghee or butter, for brushing

Stir water and honey in a bowl.  Add the yeast and let sit until foamy. Add the flour, yogurt, oil, and salt and stir until dough forms. Knead the dough in bowl until smooth, about 5 minutes. Cover and let sit in a warm place until doubled in size, about 1 hour.

Transfer dough to a floured work surface and divide into 4 balls. Working with 1 ball at a time and using a rolling pin, roll dough into a 7" circle about 1⁄4" thick. Sprinkle with garlic and scallions and press into dough.

Heat a 12" nonstick skillet over medium-high. Working with 1 piece dough at a time, cook dough, plain side down, until bubbles appear over the surface and brown spots appear on the bottom, about a minute. Flip the dough and cook until the bottom gets browned in spots as well. Transfer naan to a plate and brush with ghee.  Sprinkle with more kosher salt and serve hot.

https://www.flickr.com/photos/joyosity/18349548778/in/dateposted-public/

Next:  Pasta con le Sarde
Previously:  Tofu Tikka Masala
Last Year:  Vegan Almond Joy Ice Cream and Bon Bons
Two Years Ago:  Spaghetti Carbonara for One
Five Years Ago:  Elote (Mexican Grilled Corn)
Six Years Ago:  Black Sesame Ice Cream

Sunday, March 31, 2013

Bunny Rolls... Check Out My Buns-ies

I just had to share these cute bunny rolls that I made for Easter dinner.  Everyone loved them they were a huge hit.  The dough recipe is from a previous post by my sister, Lynn, and since the recipe has been pinned over 250,000 times why use another?  She calls it Best Rolls Ever. 

Now, I can't claim that I came up with the bunny design all on my own.  Nope that's what Pinterest and Google are for.  Bunny design came from Taste of Home.
Though the design and a different recipe is used at Taste of Home they didn't have pictures of step by step instructions which I will include here.
After you make Best Rolls Ever recipe you will need to let your dough rest for 30-60 minutes. Punch down your dough and with a rolling pin roll out your dough to at least 20 inches long one way (see picture below). Using a pizza cutter you will cut horizontal 1/2 inch strips.  Then cut the strips vertically 10 inches, 5 inches, two 2 inches, and then one inch.  Body, head, 2 ears, and tail.
You can see from the picture below that I formed the 10 inch strip into the body, 5 inch for head, two 2 inch strips for ears, and then 1 inch for cotton tail.
Let rise for 15-30 minutes.
 
 Bake in the oven at 350 degrees for 12-14 minutes.

Oh YUMMY!

The Easter bunny was pleased too.
Okay okay we didn't give any to the Easter bunny but if we did I'm sure he would approve.

 Enjoy!


Happy Birthday Pam!

It was Pam birthday and her lovely husband set the cooking party with good friends  for her as she love cooking and Thai food. They are real...