During my stint as a vegan (which became vegetarianism and then pescetarianism until I finally gave up this year and became an omnivore again), I would often crave Bon Chon chicken. That gloriously crispy, thin-skinned chicken with the amazing soy garlic glaze would haunt me, and I'll admit that I sometimes gave in. It was just too good to give up.
I wish I had had this recipe for Korean fried cauliflower back then, but to be honest, this substitute is so good, I might even prefer it over the real thing. I adapted the recipe from Serious Eats' well researched recipe and just reduced the amount of vinegar and upped the garlic in the glaze according to my own taste preferences. If you don't have the sesame seeds and/or finely shredded coconut to add to the batter, you can omit them, but they add some great texture to the cauliflower.
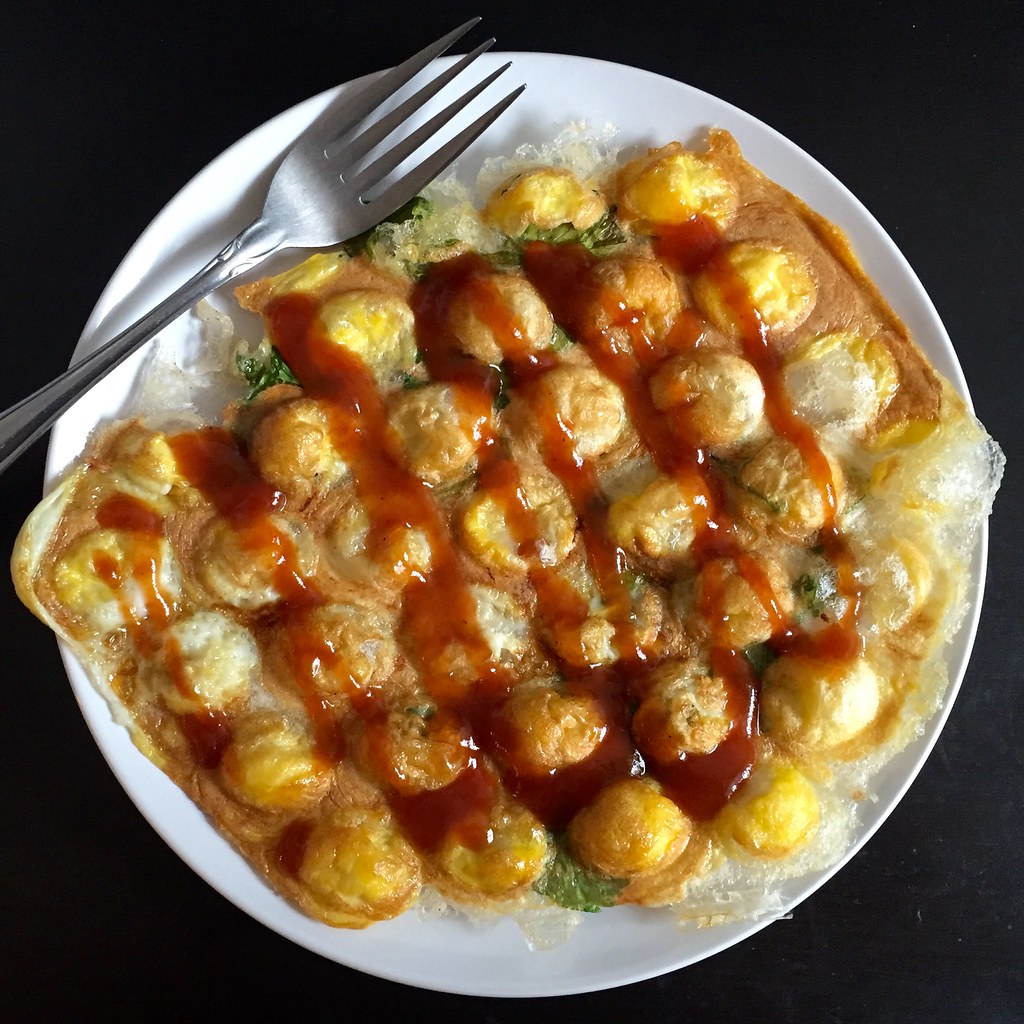
Even though they're meant to be an appetizer, I ended up eating them with rice like I would with sesame chicken. And if you want to save any as leftovers, I would refrigerate the cauliflower after they're fried and drained. The next day, heat them up in the toaster oven and then toss them with the sauce; that way they will still be crispy.

Soy Garlic Glazed Korean Fried Cauliflower (adapted from Serious Eats)
serves 4-6 as an appetizer or 2 as an entrée
For the Soy Garlic Glaze:
1/4 cup soy sauce
1 teaspoon rice wine vinegar
2 tablespoons mirin
6 tablespoons brown sugar
1 1/2 teaspoons mince garlic
1/2 teaspoon freshly grated ginger
Pinch of red pepper flakes
1 teaspoon toasted sesame oil
1 1/2 teaspoons cornstarch
Combine everything except for the cornstarch in a small saucepan and heat over medium heat. Make a slurry with the cornstarch and 1 1/2 teaspoons water. Whisk into sauce and bring to a boil. Cook until the sauce is reduced and slightly thickened, about 3 minutes.
For the Korean Fried Cauliflower:
Vegetable oil, for frying
1/2 cup cornstarch
1/2 cup all-purpose flour
1/2 teaspoon baking powder
1/3 cup toasted sesame seeds
1/3 cup unsweetened finely shredded coconut
2 teaspoons kosher salt
1/2 cup cold water
1/2 cup vodka
1 head cauliflower, cut into 1/2" - 1" florets
Pour enough oil into a Dutch oven or large pot for it to reach at least 2". Preheat the oil to 350°F.
Combine the cornstarch, flour, baking powder, sesame seeds, coconut, and salt in a large bowl and whisk until homogeneous. Add the water and vodka, and whisk to form a smooth batter.
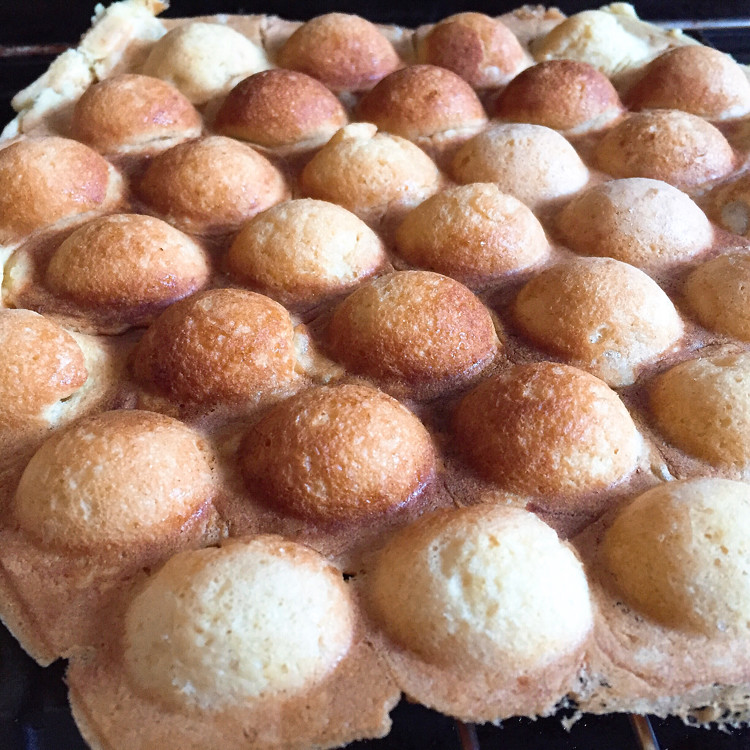
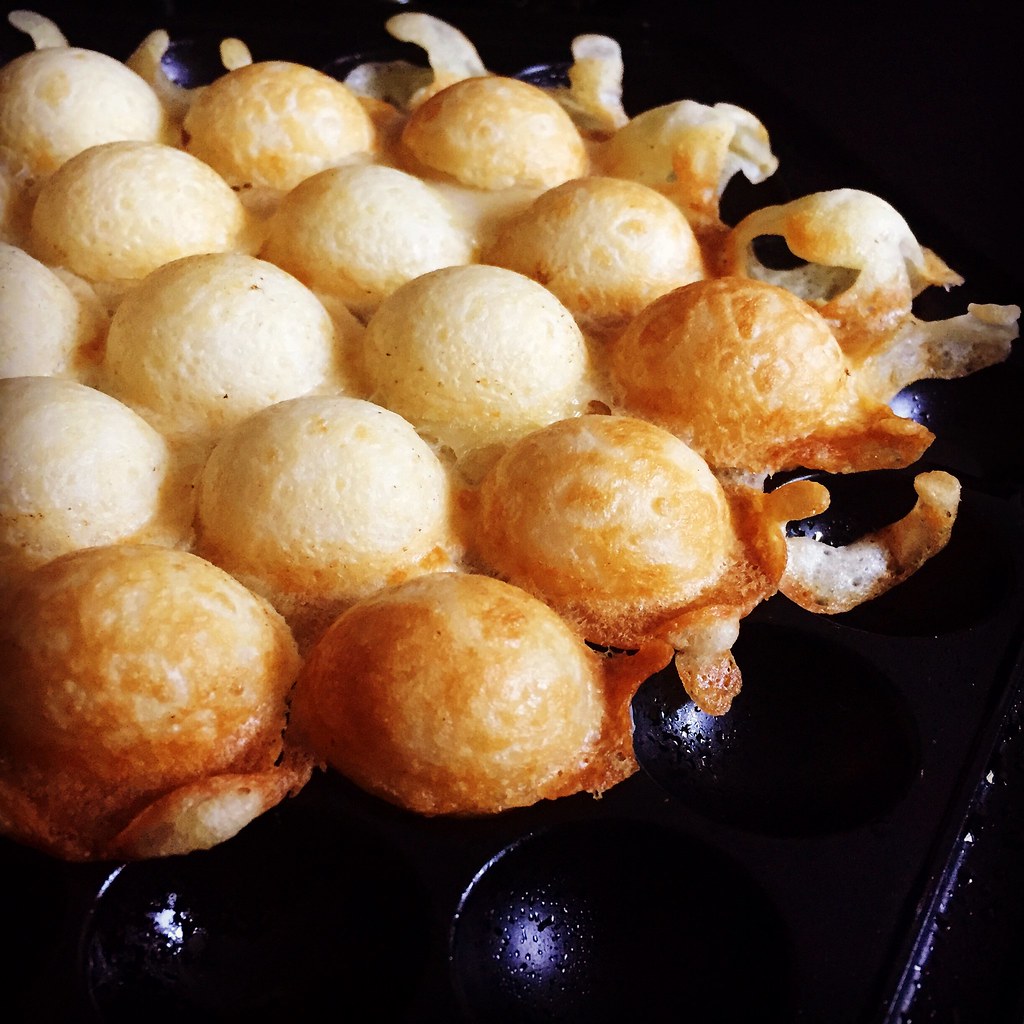
Add the cauliflower to the batter. Fry the cauliflower in batches, letting the excess batter drip off each one before you lower it into the oil. Remove with a slotted spoon when golden brown and let drain on a paper-towel lined plate.
Toss the fried cauliflower with the soy garlic glaze and serve immediately.

Next: Pear Apple Cranberry Slab Pie
Previously: Caramelized Honeycomb Ice Cream
Two Years Ago: Hokkaido Milk Bread Three Ways (Traditional, Braided, and Taro Swirl)
Three Years Ago: Salted Butter Caramel Apple Pie with Vodka Pie Crust